
PROJECT
Stable Diffusion – Video to Video in Python
Project Overview
Before I get into how this project works, I should say that this was purely for the challenge of orchestrating an end-to-end workflow. The output is a novelty, in line with the early AI video that looks all choppy. Regardless, this project has utility worth replicating.
I know how to use FFMPEG; I know that it can split video to frames, and combine frames to video. I know Stable Diffusion; I know how to change images using img2img and generate new ones using txt2img, as well as the Controlnet openpose and canny plugins. This got me thinking: “can I orchestrate video to video in stable diffusion?”
To achieve this, I broke down the project into the following steps:
Convert video to 1:1 cropped image frames -> feed each frame into Stable Diffusion -> optional upscale in ‘SD Ultimate Upscale’ -> stitch back into a video. In this project, I’ll walk you though how I did it.
Pre requisites
You will need the controlnet models before you attempt to use them. If you want to know how to set up and use Stable Diffusion, I have a guide on that here: https://thecyberdragon.com/home/projects-page/project-stable-diffusion/
You can download the Controlnet models from HuggingFace:
You will also need to install the following Python modules via pip:
- glob
- pymediainfo
It’s also mentioned below, but you also have to need FFMPEG installed on your computer. You know if you have it, if you open a cmd window and type ‘ffmpeg’. If it says it’s not a recognised command, you don’t have it installed.
FFMPEG -> ffmpeg.py
Firstly, we’ll need to have a way to split a video into frames, and later on, stitch frames into a video. This will be done using FFMPEG. It’s an open-source conversion software that I’ve used as the basis for a conversion automation software at my workplace.
You need FFMPEG ‘installed’ which means downloading the FFMPEG exe file and copying it onto your C drive. Copy the containing folder’s path and add that to the your computer’s environment variables. You can find how to do this online with a little Google search.
I made a new ffmpeg.py file that allows the functions to be isolated from the rest of the script to keep it tidy and organised. There are three functions:
- FFMPEG (generic function to call the software)
- ConvertFramesToVideo
- ConvertVideoToFrames
The generic FFMPEG function uses the subprocess module in Python to run the command, build the cmd line arguments as ‘ffmpeg input args output’.
Next is ConvertVideoToFrames. From top to bottom, firstly we take the filename without the preceding path and replace any ‘.’ with ‘_’ so we can make the file naming predictable later. Generally, ‘crop’ will always be true unless you’re intentionally using a different aspect ratio in Stable Diffusion. We try parse the video in a module called MediaInfo which is an amazing standalone app as well for showing media metadata. We check which dimension is larger, then use logic to trim down the dimension of the longer size to match the shorter side by removing an even amount from each side of the larger dimension. The result is a square image that’s centered regardless of the input resolution.
Secondly, ConvertFramesToVideo does the reverse and stitches the frames into a video. After using the Glob module to get all PNG files in the input folder, we take the first two frames, get the filenames only and see which is shortest. We then iterate through the characters to find the common starting string in all files (presumably) so we can pass that information into the call of FFMPEG. The command then specifies to convert the images to avc video using the %06d wildcard meaning a 6 digit number of any kind to auto-convert all frames to the video sequentially.
With the FFMPEG code done, this stays a standalone script file that gets imported later.
Stable Diffusion API Script -> stable_diffusion_functions.py
The is the largest and most difficult part of the project, so buckle up!
The foundation of how this works is a function called LoadImage, without which, this whole thing wouldn’t work. It’s a simple few lines of code that reads the data of an input image and returns the value as a base 64 string. This is how Stable Diffusion will read the input image for both txt2img and img2img.
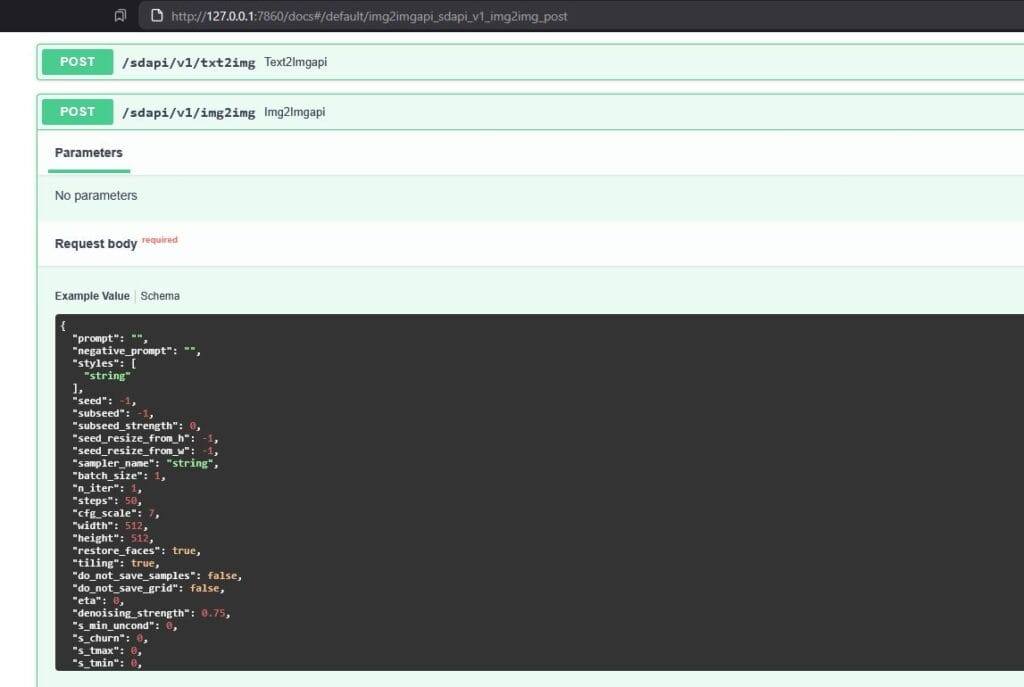
You can source information on the API use in Stable Diffusion if you go to the URL/docs. This will give you information on parameters of the core functionality, but won’t help you with Controlnet much, if at all. Another function that gets used later is the ReturnImageMetadata function.
There are three remaining functions:
- GenerateTextToImage
- GenerateImageToImage
- GenerateUpscaledImage.
GenerateTextToImage
The time-consuming thing here was figuring out how to use the StableDiffusion API, as the documentation isn’t the best, it changes across versions. A single forum post was the saving grace that allowed me to finish this project. There’s a surprising lack of information about the SD API for Controlnet. First half of the function:
The GenerateTextToImage function is what we’ll start with. There are a lot of inputs, and some of them I haven’t even used in the main script, but it gives you the option to utilise for example, the sampler or steps if you want to use this function for other programs. The way this works, is the SD API has a specific URL you must send the request to: your_url/sdapi/txt2img. The script sends the request, Stable Diffusion makes the image, and sends back the result, as well as some other stuff such as the status code to indicate what happened.
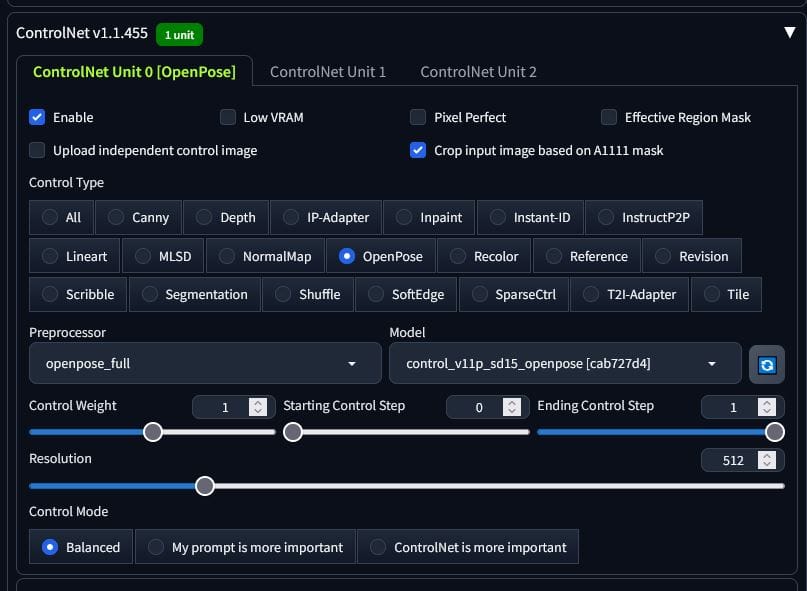
We have to create a dictionary that has the structure of a JSON which we assign to the variable ‘payload’. If you have the know-how to complete this project, you should be able to read the script well enough to see how the initial payload is constructed and how the start of the function works. Below the initial payload, we check if openpose is true and if the input image for openpose is not empty – if both conditions are true, then we can proceed safely with openpose. There is no canny here as we’re using txt2img, not img2img. The purpose of this function will be to create an entirely new image using just the skeleton of the original subject. The result isn’t fantastic, but it’s fun.
We specify the key in the payload dictionary ‘alwayson_scripts’ to be a dictionary itself, with the key ‘controlnet’ and the value to be another dictionary (you can see how this got very confusing). Inside the dictionary inside alwayson_scripts inside controlnet’s value, we declare the key ‘args’ with the value as a list containing a dictionary. Again – confusing. Here is where we actually set the values of the Controlnet plugins. It’s a list of dictionaries, as we can stack these as we will later with openpose and canny. Second half of the function:
We have to pass the base64 string of the input image to this dictionary along with some other values that we don’t really need to change (but you can add inputs for them if you want to). The payload is then posted to the API URl using the requests.post method. If we receive status code 200, it means we’ve got an image returned from Stable Diffusion.
Lastly, we iterate through the index, image data or using enumerate on the response JSON. We use the index in the saved image name as if you use openpose or canny, you’ll get multiple images returned. The 0 index is the generated image so we skip the others (you can save them if you wish).
GenerateImageToImage
This function looks very similar to the txt2img function except the specific img2img settings like denoising_strength are included. The init_images has to be a list containing the image base 64 variable returned from the LoadImage function.
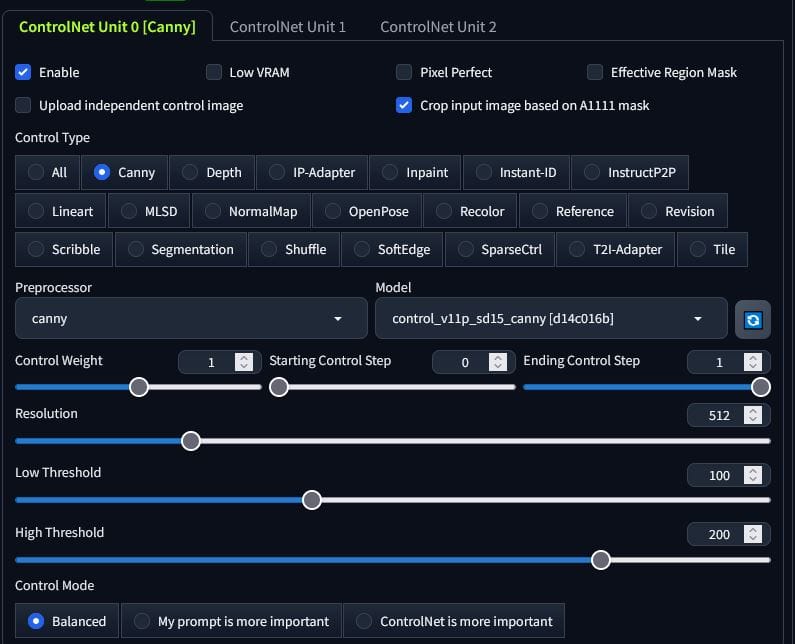
For the Controlnet additions in the alwayson_scripts, if we use one but not the other, we assign alwayson_scripts the value we did in txt2img. If we use both, we add two dictionaries within the ‘args’ list. This is like enabling two Controlnet sections.
The only difference besides the API URL being img2img instead of txt2img, is the image input directly in the initial payload variables. We receive the response from the request and save the image in the exact same way as we did with the txt2img function.
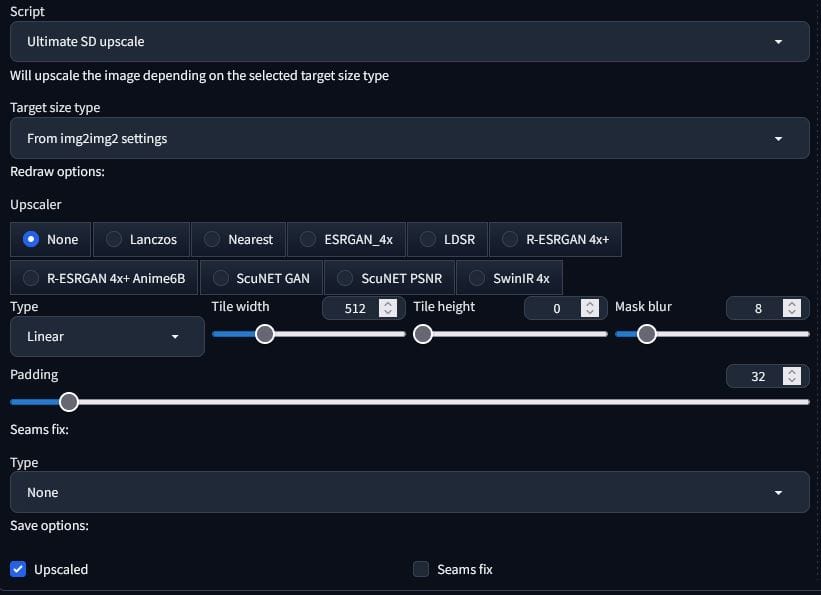
GenerateUpscaledImage
Finally, we have the upscale function. This is super similar to the img2img function except we won’t use canny or openpose, by default or optionally. Instead, we will include the key; “script_name” and assign the valur “Ultimate SD upscale”. We will then add the key “script_args” and the value will be a list containing the various settings in the script. The rest is rinse and repeat of the img2img function. The only other difference, is that the images have _upscaled suffixed onto them before the file extention.
Main Script -> orchestration.py
Now it’s time to build the main script file. We need to import all of the functions from the ffmpeg and stable_diffusion_functions scripts. I did this by explicitly importing the functions so I had them in front of me. I used it during the build as well, so I knew which functions were complete and which ones weren’t.
How this works, is we have a working directory, and that will contain an 01_source_video folder containing the video to be worked on. If you do that, then we simply have to target the containing folder to automate the process.
ConvertVideoToCroppedFrames
This function is the first step. It simply lets the user set a folder to act as the working directory. If there’s no 01_source_video, then it doesn’t work. After that, it will create the folders it needs, check if an mp4 file exists, and if so, it will use the function in the FFMPEG script to spit out an image for every frame in the video.
Img2img and txt2img menu functions
These functions serve as the place you input data and select from options like using canny or openpose, selecting a model and setting the denoising strength. After this, the arguments for the working directory and settings are passed to the relevant functions to execute the Stable Diffusion functions from the stable_diffusion_functions script file on all of the files spit out by FFMPEG. There’s also some skipping built in if you’ve passed in a working directory already, you won’t get prompted for it again. This means we can run through end-to-enbd with automation, or execute in steps if we wish. These menu functions also use the find_model_file function.
Img2img and txt2img main functions
These are the functions that after checking if the working directory exists, creates the prompt both positive and negative, selects the model to use, generates a random seed to use on all frames, and iterates through all frames and passes them to the SD API to generate new images. Note, that I’ve set the default model as “art\amour_v10.safetensors”. There’s no real reason for this, it just provides me with a default model to use that I like. You should change this to whatever model you want as your default, or don’t set one and simply exit the script.
Upscale function
This is very similar to the above functions except it will find the source file’s model and seed and use those parameters in the img2img generation, not include the actual prompt used (only quality in the prompt), then iterate through the images in the img2img folder in your working directory, or txt2img folder if there is no img2img folder. If there are both img2img and txt2img folders, it will use the img2img folder.
Stitching to a video
From here, you can either stitch upscaled frames to a video, or just the img2img or txt2img files if you want to skip the upscale process entirely (it takes forever). The only difference between the two functions are the folder they use as the image directory.
Automated setting
This function will ask you to input all of the information you’ll need, and after the frames are spit out from the FFMPEG function and you enter either txt2img and img2img, the remainder is automated and doesn’t require input so you can leave it to run.
Menu
Finally, we just need a menu to control all of the functionality. I’m partial to a nice numerical basic menu, so that’s what I’ve made.
Summary
There we have it! An automation script built in Python that uses FFMPEG, MediaInfo, and the SD API to take any old video, split it into cropped frames, run them through Stable Diffusion, optionally upscale those outputs, and stitch them back into a video. For an upscaled video on my PC using a GTX 970 graphics card, it takes about 1 hour per second of video. It takes a long old time. If you don’t upscale, the time drop is dramatic, and to be honest, 512×512 looks fine. You won’t be making impossible to notice real life replica video using this method, but it’s fun to build it. One of the best takeaways for me was the requests to an API using a JSON payload – that’s a cool skill to learn.