PROJECT
Self-Hosted LLM with UI and RAG
Overview
The rise of large language models (LLM) that can produce high-quality responses to prompts (when they don’t hallucination), is bringing new possibilities to general workflow. Once such thing is the possibility to talk to sources of information, whether that’s a web page or a document.
In a previous project, I set up an Obsidian knowledgebase with cross-device syncing. With this in place, given that these documents are locally-stored markdown files, it means I can then take the next step and use an LLM to talk to them. In this project, I will show how I self-hosted multiple AI LLM’s with a nice UI front-end that’s capable of retrieval augmented generation (RAG – retrieving information in real-time from a source). Let’s get started!
Installing Ollama
Firstly, we’ll need to install Ollama. Note: There is a simpler version that combines this with the UI, but I didn’t do that and I like automating things once I’ve already done the work, not before.
Download and install Ollama. Link: https://ollama.com/
Ollama will allow you to interact with LLM’s in your cmd window. It will appear in the system tray… as a llama.

To see that it’s working, open a cmd window and type:
You’ll know it’s working because it will return the commands and usage for Ollama.
Pulling and running models
To pull models means to download them and make them available for use. You need to do this to run a model
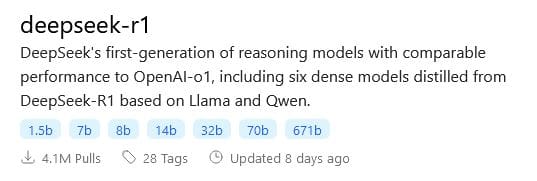
To see a list of available models, go to the ollama models page.

There will usually be multiple versions of a model.
For example, on the Llama3 page, it shows you the two model names.
You can download as many models as you like. Note: larger models require more computer power. You can use a 90B model, but it will be very slow. Conversely, smaller models like the 8B model will work nice and fast, but they won’t be as “smart” as the larger models. It’s always a balancing act between the need for brain-power, speed and the specifics of the overall model (llama, gemini, phi etc).
To run a model, type in ollama run [model_name].
Then just type away in the cmd line window and talk to the model.

Open Web UI
Next, it’s time to get a UI up and running. I’ve chosen to use Docker Desktop for this so I have a nice GUI to interact with my container(s).
Download link: https://www.docker.com/products/docker-desktop/
Once installed and running, this will allow you to manage any running containers, whether they were set up in the Docker Desktop UI or not.

Open WebUI have their own documentation you can consult:
In a cmd window, paste in:
This should start a new docker container in detached mode (-d) on port 3000. Once it’s running, you can navigate to localhost on port 3000 – http://localhost:3000/.
You will be asked to set up an admin account (don’t forget the password). After this, you can start using OpenWebUI.
Creating Models & prompts
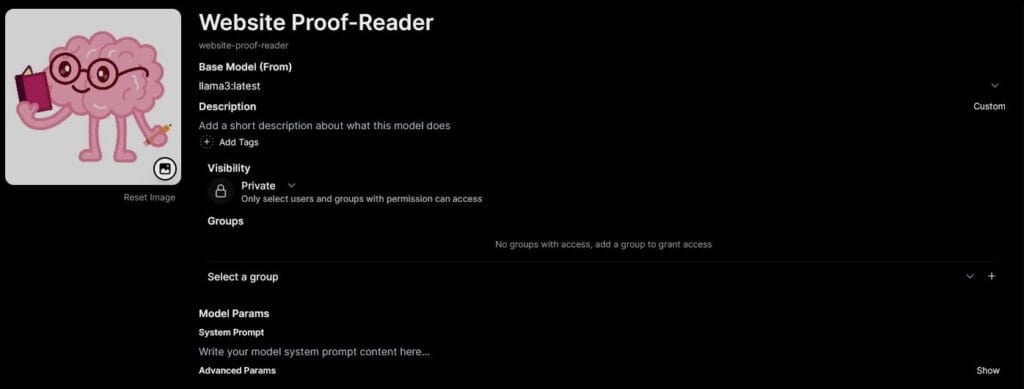
You can create models which will be like a custom chat for a specific use case. Click on Workspace > Models > + Button. Everything within a custom model can be changed later so don’t stress about getting it perfect.

Give it a name. I’m going to make one to proof-read these project webpages you’re reading right now.
Choose a model – I’m going to use something like llama3:latest because I need a decent model for this.
System prompt – This is the core function of this model. I will be telling it that it’s designed to proof-read blog-style web pages.
My system prompt:
You are designed to proof-read blog-style web pages written in a casual and instructional manner and feedback ways to fix and improve: grammar, spelling, readability, the content’s factual accuracy, tone, changing tense and anything else that would be of benefit to know. Make your assessments in context to the content in the page. With each critique you provide, reference the paragraph and line number, and show what the text looks like now and what the suggestion you provide would make it become. Use the following headings to structure your feedback: grammar, spelling, readability, the content’s factual accuracy, tone, changing tense, other suggestions.

After that, save the model and it’s ready to use! Simply click on it to open a new chat with your new custom model. I’m going to go a step further and create a template prompt to use with this to make the results more consistent and better.
I’m going to make a template prompt. Go to Workspace > Prompts > + Button.
Name it – this will be callable by typing / and the name of the prompt in the chat.
In the prompt, I want to associate the prompt content with the system prompt to better associate it with the purpose of the model.

Proof-read, attached webpage, page, critique, feedback and structure are good places to start, and to mention being faithful to the system prompt. It might be helpful if it’s reading content to provide critique, that you mention any localisation of the language, too.
My prompt:
Please proof-read the attached webpage document written in British English. Read the page and provide critique and feedback in a structured way according to your system prompt.
Make a distinction where possible between factual and technical error, and subjective suggestion.
Always include all headings in the output and specify if there are no mistakes or suggestions.

There we go! We have a custom model that will respond and analyse the prompt in a specific way, and we have a template prompt that associates with the system prompt to provide easy-to-access and standardised instructions.
Retrieval augmented generation (RAG)
Click on Workspace > Knowledge > + Button.
Name it and type a description. Then, press Create Knowledge.
Here you will upload documents that will be considered part of the ‘Knowledge’.
Click on the + button to add documents and they will upload to the container.

Here’s the truly exciting part of this project. RAG allows you to query your own documents when prompting your model. This means I can upload a week’s worth of journal entrees and ask the LLM if it notices any reoccurring trend or events, and to analyse my week in a way that I can’t really do (without a lot of effort).
Once you have a Knowledgebase set up, all you have to do is query this by referencing it in the chat with #Knowledgename. Example: #Journals. You can also attach individual models using #PageName regardless of what ‘Knowledge’ they’re in.

Note: Larger models are required for RAG. Smaller models around the 1B parameter mark can’t even do it. It will take some computer but you need to use a decent model.
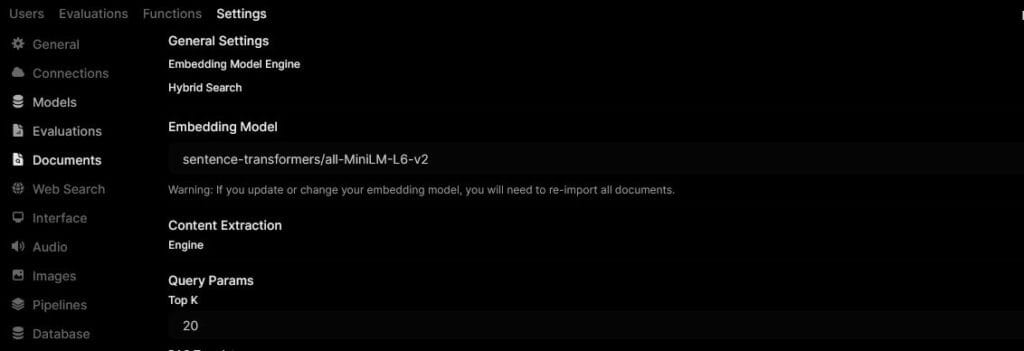
Additionally, there is a cap on the number of documents a RAG request can recall information from. Click on your account in the bottom left > Settings > Admin Settings > Documents.
Query Params > Top K – This box controls the maximum number of documents the LLM can search through. I had a lot of frustrating testing time whereby I’d ask it to analyse a week’s worth of journal entrees only to have it reference 2 and say it couldn’t find anything from this week even though the pages were 100% in the ‘Knowledge’. Set this as high as you need, but be mindful that it will take up more resources and take longer.

Summary
That’s it! After this project, I now have a customisable self-hosted LLM with a nice front end with custom models, custom prompt templates, document upload, Knowledgeable and RAG on whatever documents I like. The possibilities this opens up are vast and not to be underestimated.
This may very well be the base for a lot of smart automations and pipelines in the future. The sooner we learn how to control AI for ourselves and not be reliant on tech giants, we will be able to serve our own interests in the most fun and free way possible, all completely free – that’s very exciting.
