PROJECT
Stable Diffusion
Overview
Stable Diffusion – you may have heard of it. It’s an AI program to generate images. There are many versions of this on the internet, many of which you have to pay for. We’re going to host this ourselves! Your PC needs to have a decent graphics card. I’m not talking a 4090. I’m using the same GTX 970 that I installed over 10 years ago and it works great for me. Beefier graphics cards will let you do more, but I’m able to get great results with what I have.
Getting Started
Firstly, you’re going to need to download the Git repository.
URL: https://github.com/AUTOMATIC1111/stable-diffusion-webui

Click on Code > Download ZIP. You may be surprised to find out that this whole amazing AI image generator is… 2MB.
Don’t worry, it won’t stay that small for long (not by a long shot!). Move it somewhere permanent on your computer and extract the zip contents.
Inside the stable-diffusion folder is a file called: webui-user.bat.
Open it with notepad. Alter the command line args section as below.
This will help keep the application from crashing at your non-NASA GPU. Save and close the file.
Make a shortcut to this file on your desktop. To launch Stable Diffusion, simply execute this file.
Setting it up
Run the webui-user.bat file and wait for the web UI to open. It will start by downloading dependencies and setting up a Python virtual environment. You don’t have to do anything, just wait. When it finally loads, the size of the folder has gone up to over 5 GB. Don’t worry, it’ll get much larger soon!

This is what the interface looks like. It looks a bit intimidating for all of the tabs and options, and unfortunately, it will not get better from here on! Well… initially. Once we break it down, it’ll be clearer how it all works.

Go to Extensions > Available > Load from:.
This will populate Stable Diffusion with possible extensions to install.

Using the search function, install the below extensions by finding the plugin and pressing the install button::
Infinite image browsing
Stable Diffusion Webui Civitai Helper
Inpaint Anything
sd-webui-openpose-editor
sd-webui-controlnet
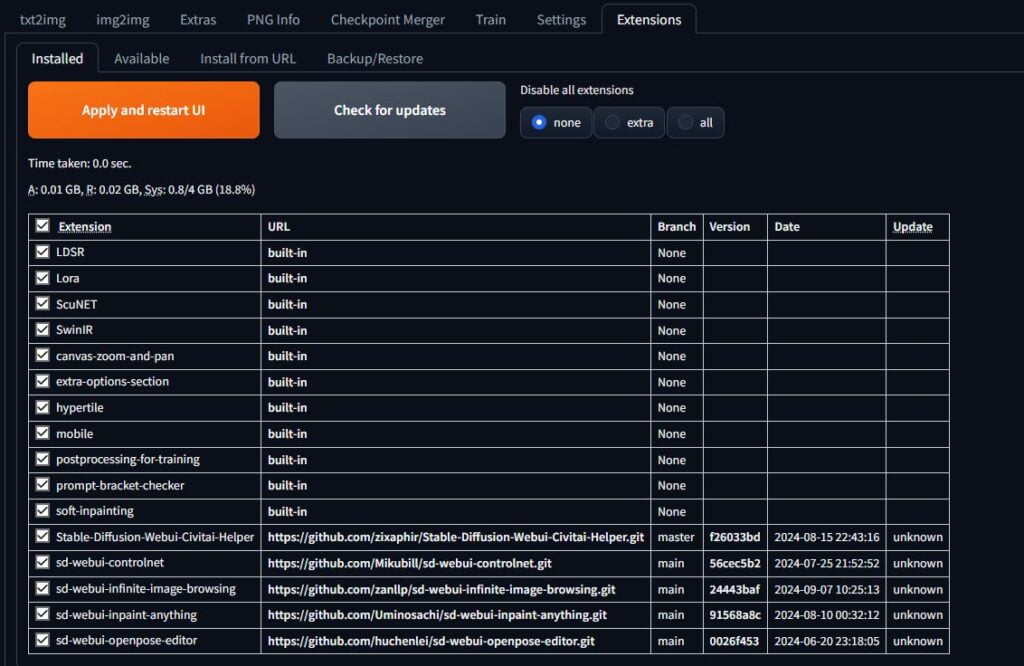
When done, if you go to Installed, it should look like this.
Go to: Settings > User Interface > User Interface.
Under the Quicksettings list, add:
sd_vae
CLIP_stop_at_last_layer
When you’ve added them both, press Apply settings, then Reload UI.

This is what it should look like when it reloads You’ll have a checkpoint dropdown, an SD VAE dropdown and a clip skip slider.
There are also some additional tabs: Civitai Helper Browser, Infinite image browsing and Inpaint Anything.
Good! Time to start downloading some models.

Where files go
To add downloadable resources to your Stable Diffusion, you drop the files in the relevant folders.
In each of these folders, you can create subfolders to organise different types of those files.
\stable-diffusion-webui-master\embeddings
This is where you put your embeddings, both positive and negative.
\stable-diffusion-webui-master\extensions
This is where your extensions go. ControlNet, Inpaint Anything etc have been saved here from the previous step.
\stable-diffusion-webui-master\models\ControlNet
This is where you put ControlNet models.
\stable-diffusion-webui-master\models\Lora
This is where you’ll put the many many Lora you’re going to download.
\stable-diffusion-webui-master\models\Stable-diffusion
This folder contains the checkpoints you’ll download.
\stable-diffusion-webui-master\models\VAE
This is where the VAE go.
Downloading files
Everything we’ll use will be on Civitai.
URL: https://civitai.com
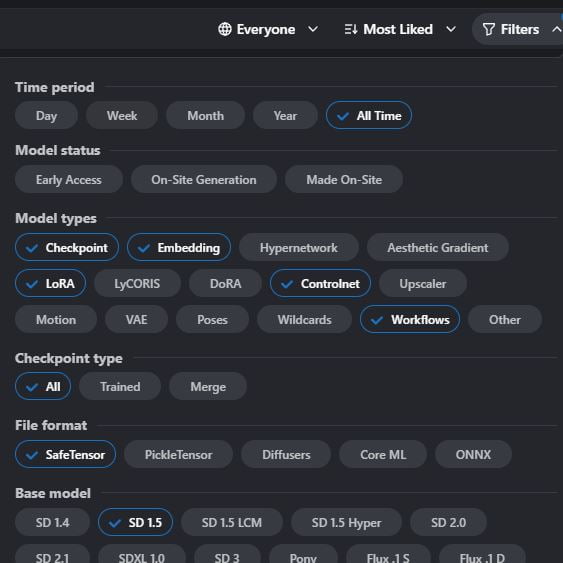
I prefer to browse the site’s models by using the filter option. I fine likes a better gauge than downloads, as some models have cool images but don’t perform very well in practice. I only look for checkpoints, embeddings, controlnet tools, lora and workflows. Safetensor is the only file type I’ve ever needed to use for file format, and SD 1.5 is fine. Don’t download XL models if you’re not using Stable Diffusion XL.
VAE
Some checkpoints have a baked in VAE, some require one to look decent. Some checkpoints, specifically for some anime and comic book checkpoints look all washed out and grey. These checkpoints need a VAE to look right. I use the same one for everything, but you can hunt on Civitai for more that you like the look of.
Download this VAE and put it in the VAE folder:
https://huggingface.co/stabilityai/sd-vae-ft-mse-original/blob/main/vae-ft-mse-840000-ema-pruned.safetensors
Checkpoints
Checkpoints are the foundation of getting a certain look. Out of all of the things you’ll download, the checkpoint is what will affect the image you generate the most. They aren’t the only thing to consider when creating a style of course, but they’re the starting point.
In the checkpoints folder, make the following folders: anime, cartoon, comic, realism, cgi.
You can make more or less, but these are a good starting place for the types of checkpoints you’ll come across.
I’ll recommend you three checkpoints per category and you can find and try out more for yourself (if you want to).
In the below examples, all photos of each type (anime, realism etc) use identical prompts. The only thing that changed was the checkpoint.
The images are also hyperlinks to the download page. These are in order left to right.
Anime
HardEdge: https://civitai.com/models/214328/hardedge
amourBold: https://civitai.com/models/228271?modelVersionId=258179
Exquisite Details: https://civitai.com/models/118495?modelVersionId=258179
Cartoon
ToonYou: https://civitai.com/models/30240?modelVersionId=140315
UnrealDream: https://civitai.com/models/17351?modelVersionId=20513
DisneyStyle: https://civitai.com/models/114413?modelVersionId=20513
Comic
XentaiWesternComic: https://civitai.com/models/242414?modelVersionId=273608
HelloFlatHardEdge: https://civitai.com/models/180340/helloflathardedge
Osenayan Mix: Illustration: https://civitai.com/models/112708?modelVersionId=286737
Realism
Dreamshaper: https://civitai.com/models/4384/dreamshaper
ArtUniverse V2.0: https://civitai.com/models/123313?modelVersionId=138808
Noosphere: https://civitai.com/models/36538?modelVersionId=138808
CGI Renders
XII: https://civitai.com/models/61826/x-ii
RevAnimated: https://civitai.com/models/7371?modelVersionId=425083
Colorful: https://civitai.com/models/7279/colorful
When the checkpoints have been fully downloaded, if you refresh the checkpoint tab, you’ll see the checkpoints but with no images. Let’s fix that!
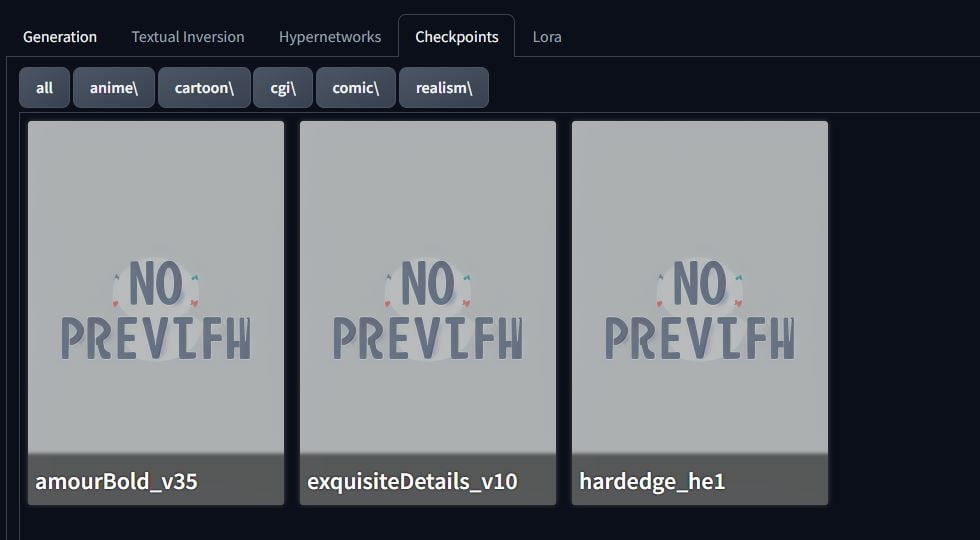
Using the Cicitai Helper tab you installed previously, under ‘Scan Models for Citivai’, hit scan and wait.

Clicking on the circular arrow in the top right, you’ll refresh your checkpoints. There we go! Images. Now you can see (roughly) what checkpoints will make images come out like. You can replace these images yourself. When you hover over a checkpoint, a hammer and spanner icon appears in the top right. Clicking this brings you to the edit metadata page where you can change the preview image.

Lora
Lora are another type of file which can drastically change the image you’re trying to make. They can range from generating a specific character, giving the image a certain ‘look’, to entire world morphs that change everything to a certain style, and everything in between and more.
Like with checkpoints, things will get messy if you don’t organise them.
For this example, make the folders: Tech Series, Details, Art Styles, Magic.
These are arbitrary, and in reality, these folders will depend on what you download. I’m going to use three Lora per folder to demonstrate what they do. As with the checkpoints, use the Civitai Helper to generate preview images to make working with lora easier and nicer.
Tech Series
The tech series by navimixu is as varied as it is awesome. They’ve put together a huge collection of cool world morphs that go beyond a style, they (as the name says) morph the world. Left to right are: energy drink tech, luxury tech, and uranium tech
https://civitai.com/user/navimixu/models
Details
When you use a Lora in a prompt (click on the image), you can weight that Lora differently depending on how much of an influence you want it to have on the image. For example, <lora:SomeLora:0.5> is half the weighting of <lora:SomeLora:1>. Lora can be over-trained so it’s usually good to opt for 0.8-0.9 strength. The below very handsome gentleman will be the control image. We’ll get into how to generate images later, but for now, this is to demonstrate how Lora work. The below images were made using a very basic prompt using Dreamshaper.
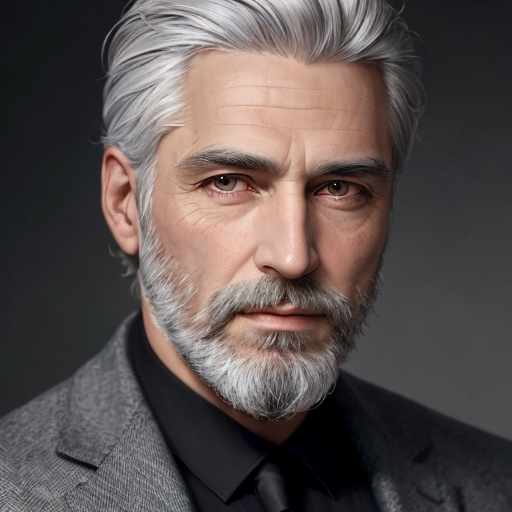
Lora: Eyes Gen
This Lora is for making high-quality dreamy eyes. Below are the results of the above prompt, checkpoint and seed kept the same, only to add the Lora. From left to right, the images are weighted at 1.0, 0.8 and 0.6. 0.6 looks the best, it’s giving the eyes a sense of life without changing the image too much. As the Lora becomes more weighted, you can see that the frame punches in more – this is because the focus of the image is more on the eyes.
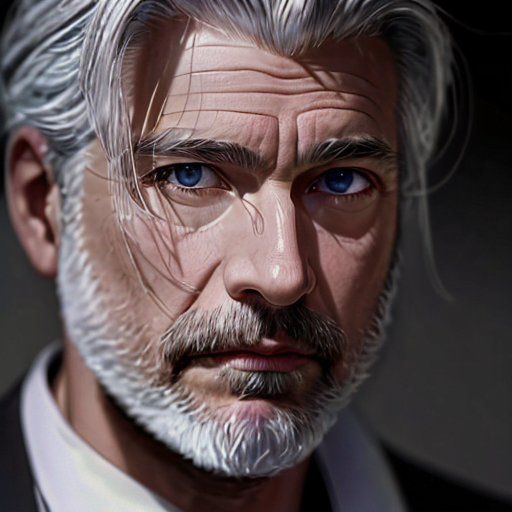
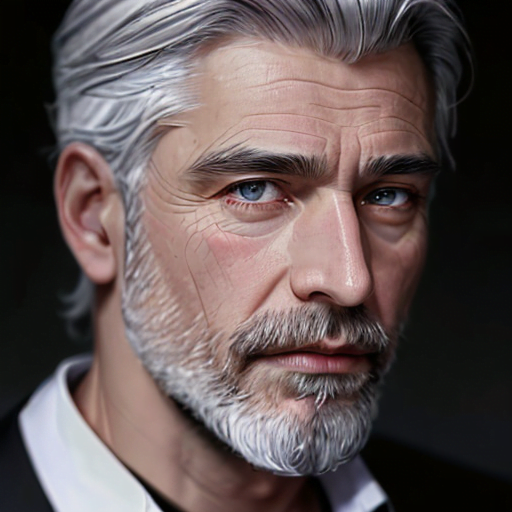
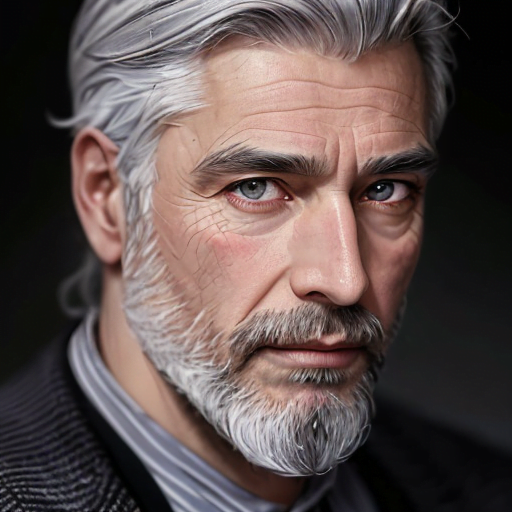
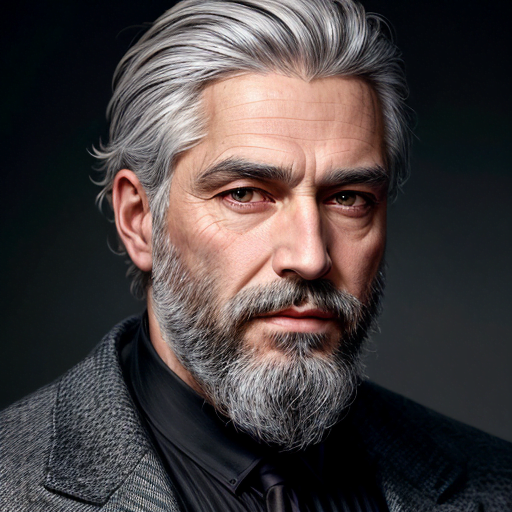
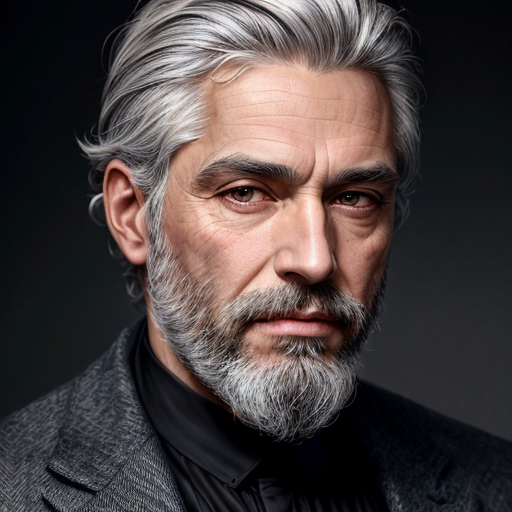
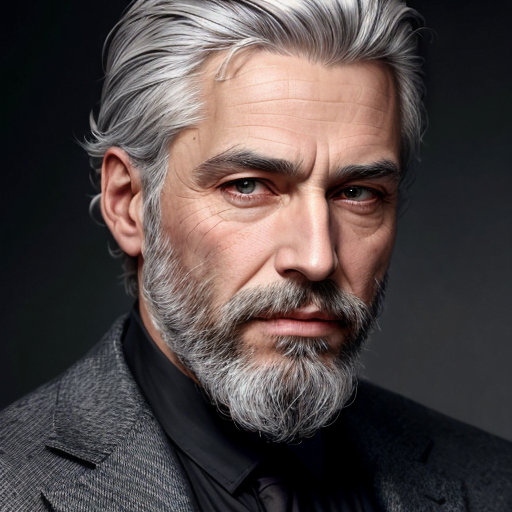
Lora: More Details
This Lora as the name suggests, adds more details to the image. Again, left to right, the results are weighted 1.0, 0.8 and 0.6.
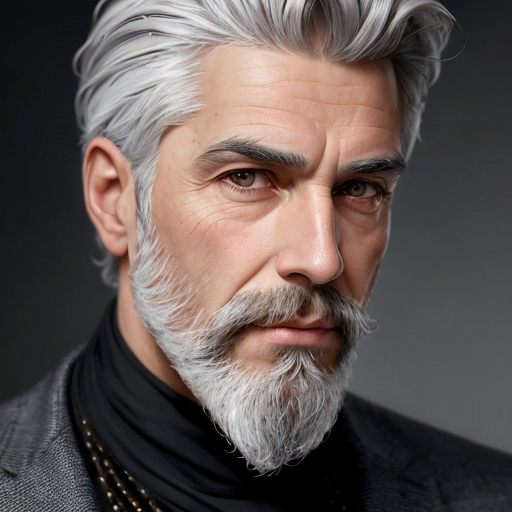
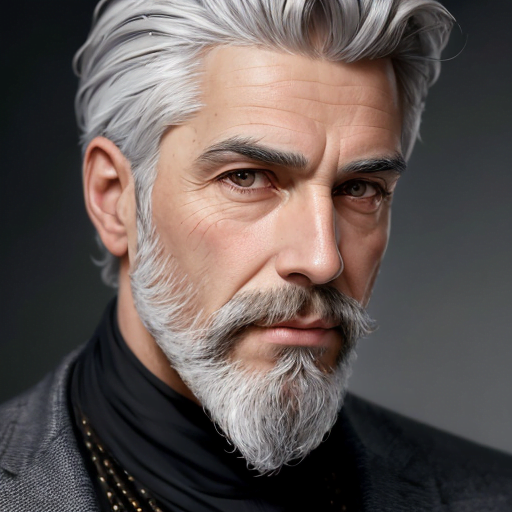
Sometimes, the results don’t really show much change when the weighting changes. Here, the image was very basic – an old guy with no background. If we had more in the image, we’d likely see more of a change from image to image. Contrast this with the control image above, it’s quite different.
Lora: DOF (depth of field)
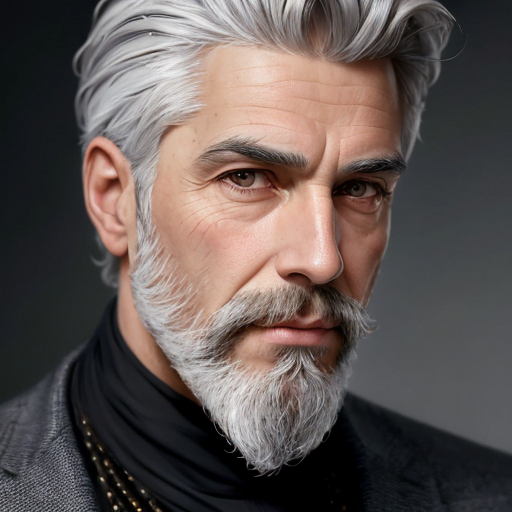
This Lora has the single task of making the subject pop by making the background blurry. You see this all the time on professional portrait photography. I’m, not sure why he’s turned into a theatre director, but that’s what happens with Lora – they do what they’re meant to and some other surprise things. You find out how these things work by testing them out.
Art Styles
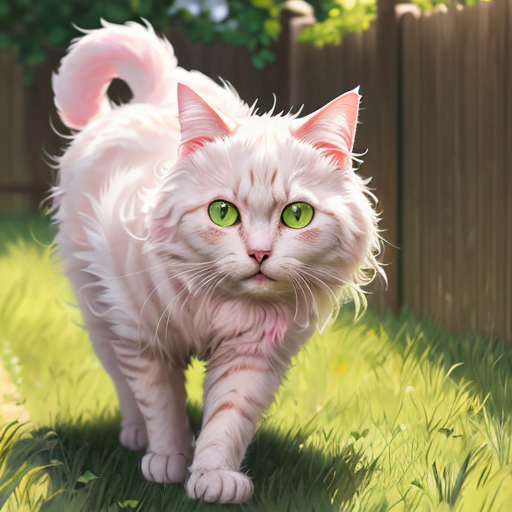
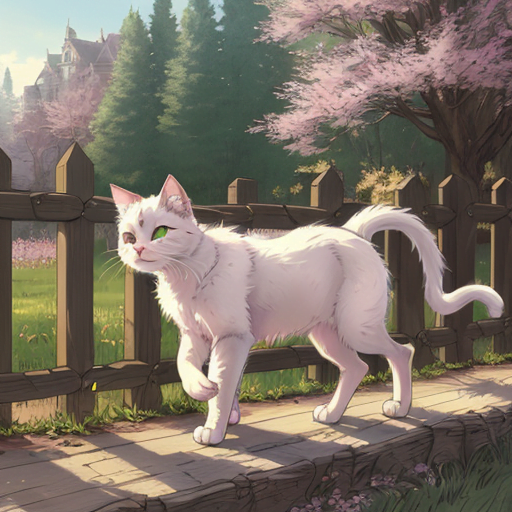
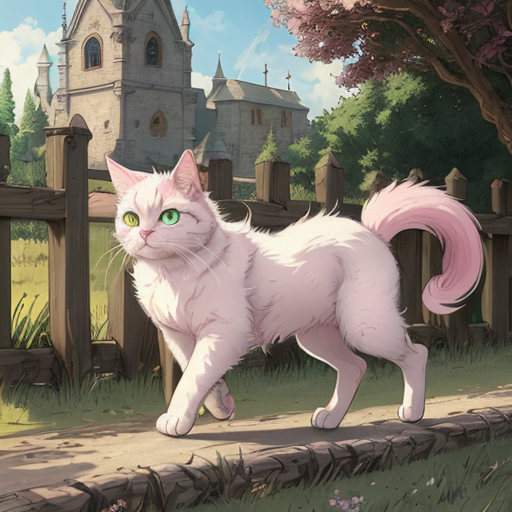
Let’s move onto style Lora. I’m simplifying this heavily because you can break down “what is a style” into whatever sub-categories you want. For now, it’s one general thing. This floof is our control image. We’ll call him Thomas.
Lora: Davinci Sketchbook
The lore should make the image look like it’s from Davinci’s sketchbook (what a shocker). As the Lora is weighted less, the cat goes from slender to a more fluffy cat as in the original prompt. The medieval fantasy castle changes to a church as well. The images are weighted left to right at 1.0, 0.8 and 0.6.
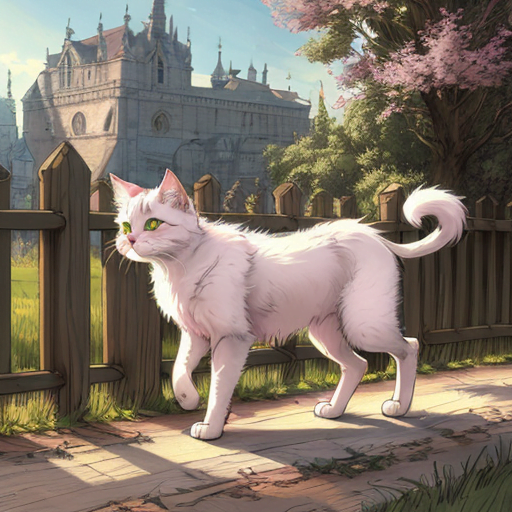
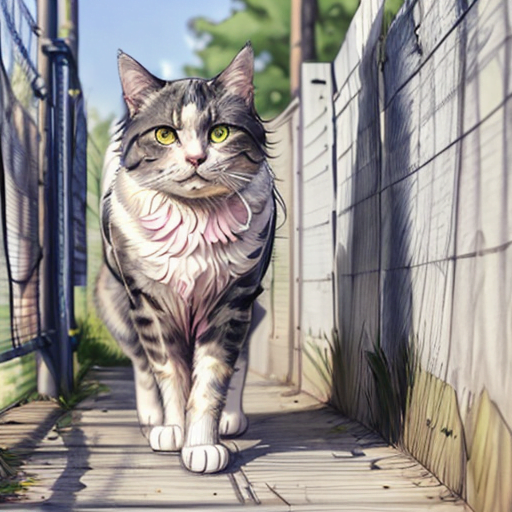
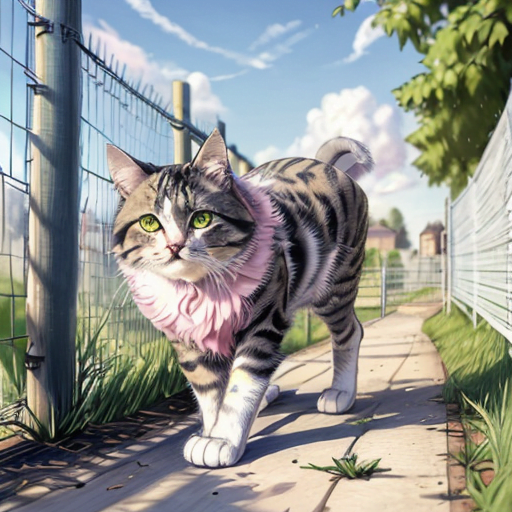
Lora: Ballpoint Pen
I’ll give you one guess at what this one does. If you were to show me the images, I probably wouldn’t be able to tell you what it’s meant to be doing, but that’s half the fun of AI images – getting interesting results. Weighted left to right 1.0, 0.8, 0.6.
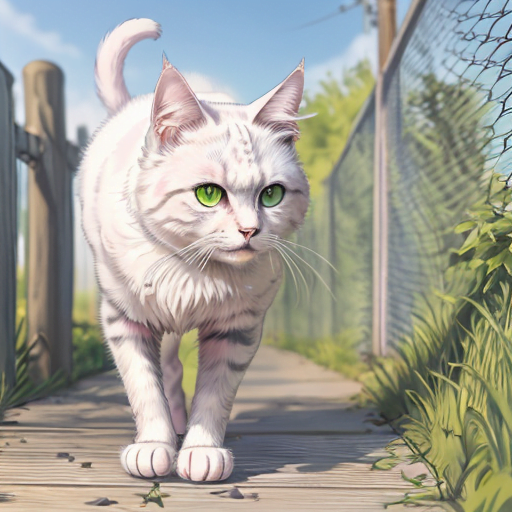
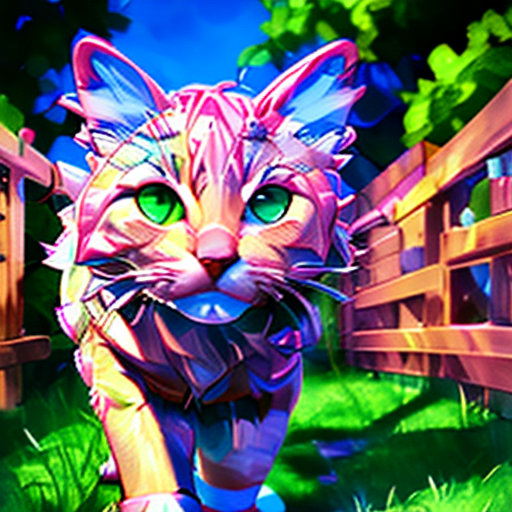
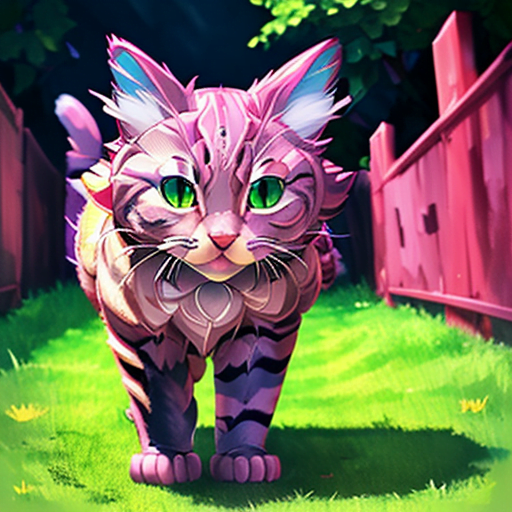
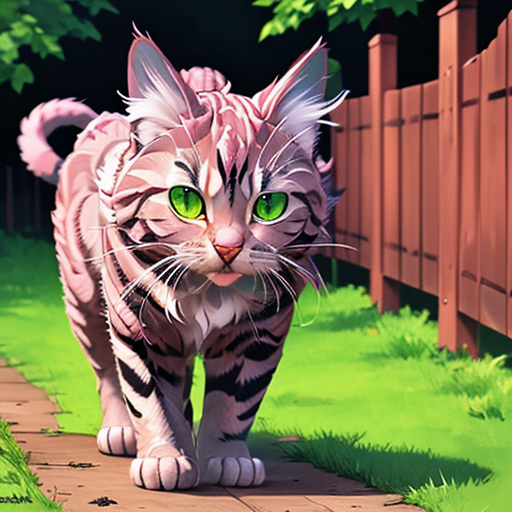
Lora: HEZI
This one is less straight-forward. It’s meant to give colourful and vibrant images but it’s primarily designed for human subjects.
Experimenting with unique combinations can give some nice results. Weighted left to right 1.0, 0.8, 0.6. 0.6 Looks the best to me. It’s like a little fantasy tiger cat!
Magic
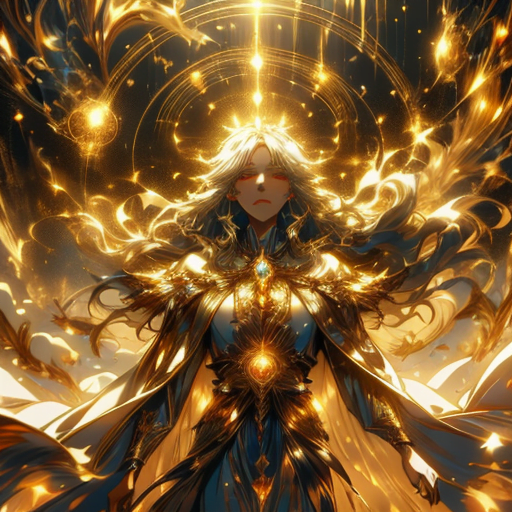
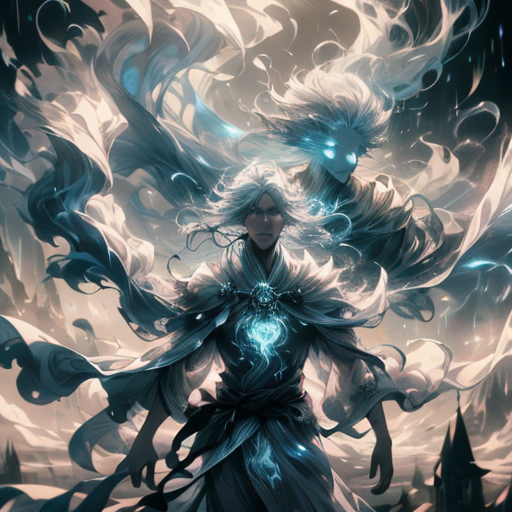
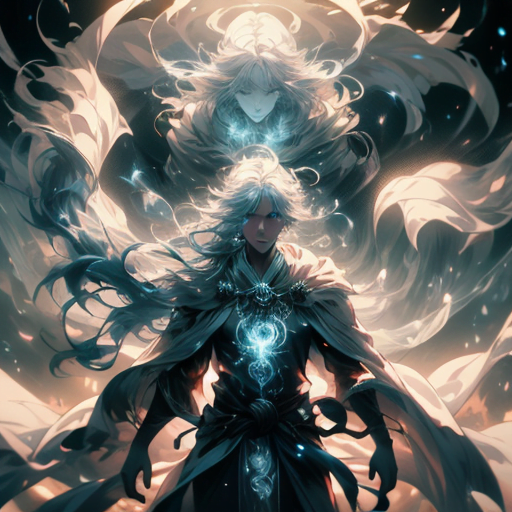
The final type of Lora I’ll use to demonstrate what we can do in this section. This will be using amorBold and the below is out control image.
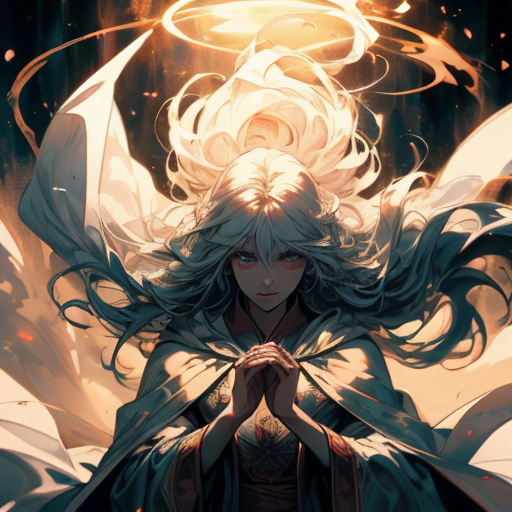
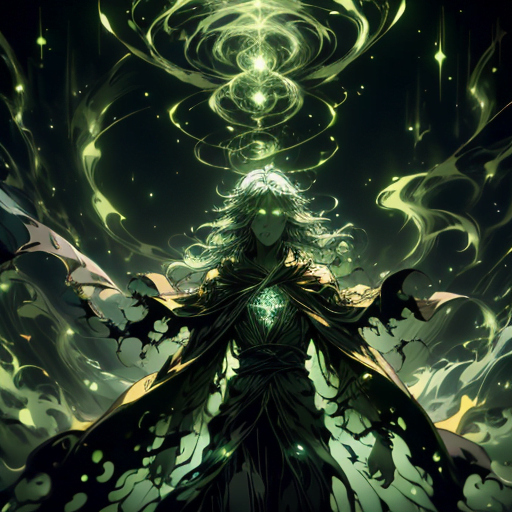
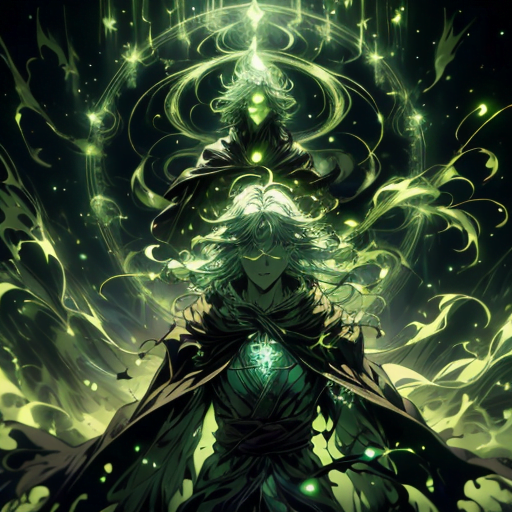
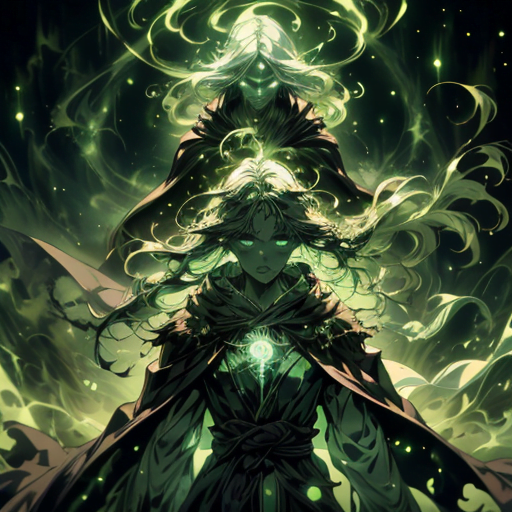
Lora: Acid Magic
The name does speak for itself, but it also gives off heavy necromancer vibes. It really depends on how you want your image to look. These partially look so awesome because amorBold is a phenomenal checkpoint.
Weighting left to right: 1.0, 0.8, 0.6
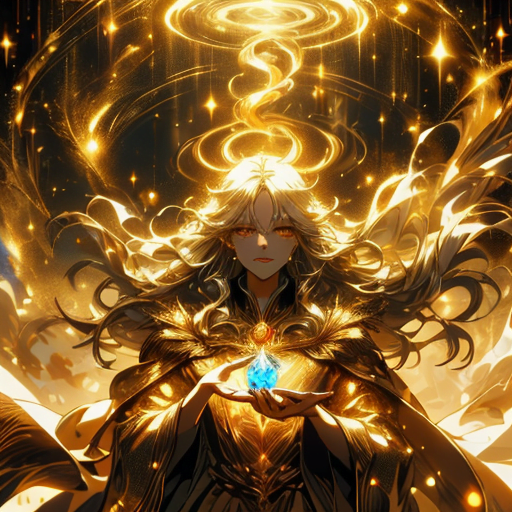
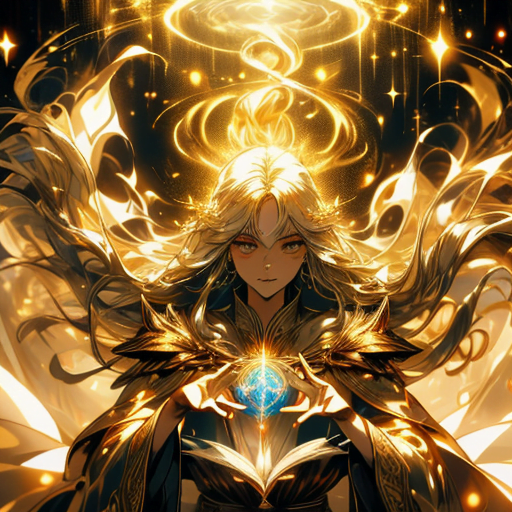
Lora: Midas Magic
The opposite direction, a sort of sun magic as it looks. I really like this, it goes with amorBold extremely well.
Weighting left to right: 1.0, 0.8, 0.6
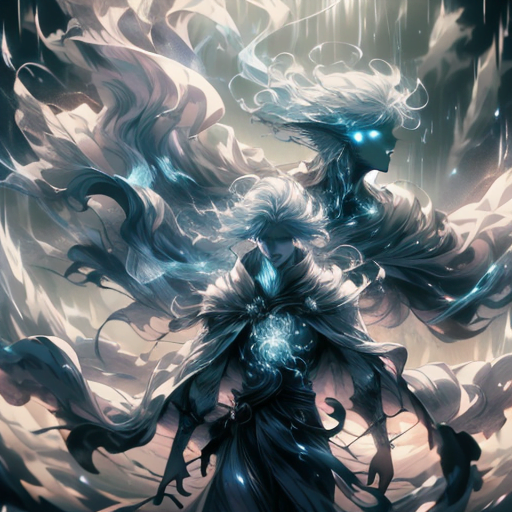
Lora: Tempest Magic
Finally, the wind magic. These Lora all give different benefits to the image they’re applied to. You can see how a Lora can entirely change the image. Weighting left to right: 1.0, 0.8, 0.6
Textual Inversions
Textual inversions are what are kept in the embeddings folder. I use them in two ways: to specify detail / focus, and to provide an easy negative prompt. Inside the embeddings folder in Stable Diffusion, make two folders: Negative, Detail.
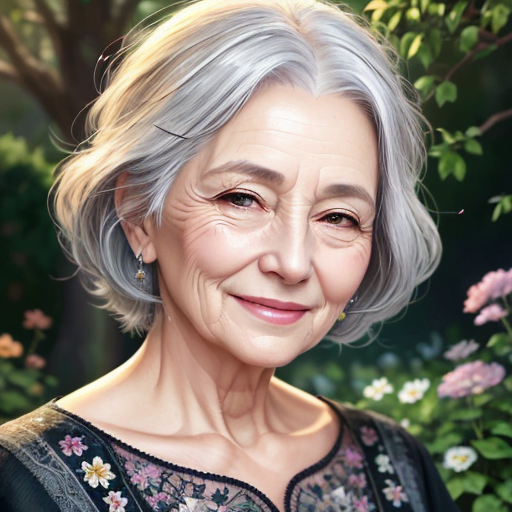
\stable-diffusion-webui-master\embeddings. Let’s start with our control, this sweet old lady.
This section will use the checkpoint: Colorful.
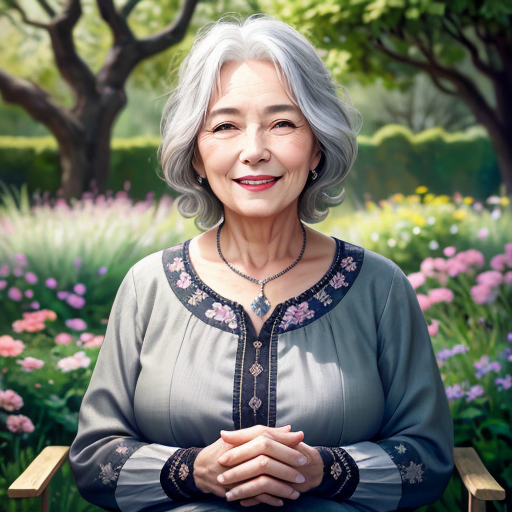
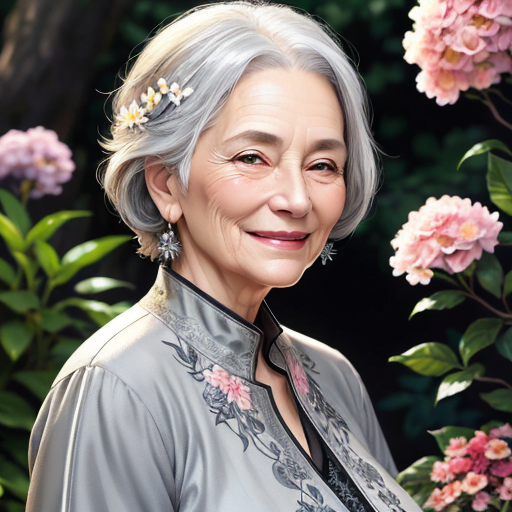
We’ll start with the detail embeddings. Left to right, are: Eye Detail, Face Detail, Overall Detail.
You can see that depending on what we focus on (eyes, face, overall), the framing changes. The eye detail picture has a nice little white spec, the face detail picture has more definition and the overall image, she has a nice coat, flowers in her hair and it’s framed nicely around a flower bush.
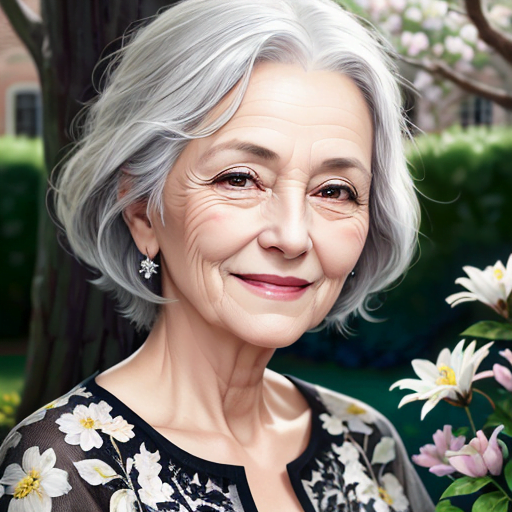
Next are negative embeddings. These don’t go in the prompt, rather the negative prompt. These negative embeddings are packed with a ton of things you don’t want – extra limbs, bad quality, deformations, bad framing, bad hands, etc.
In the following images, my negative prompt will be replaced by each negative embedding one at a time.
Left to right are: BadDream, easynegative, Bad Pictures
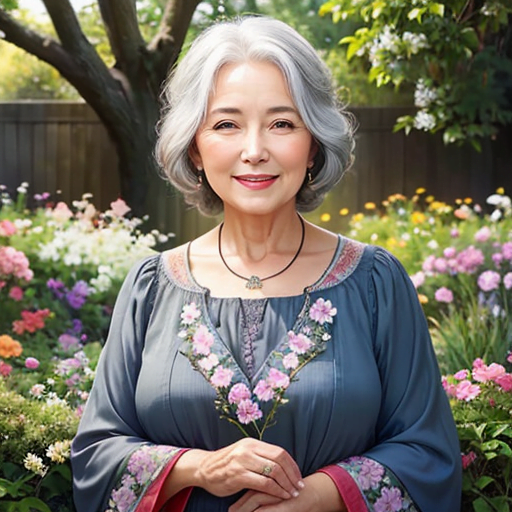
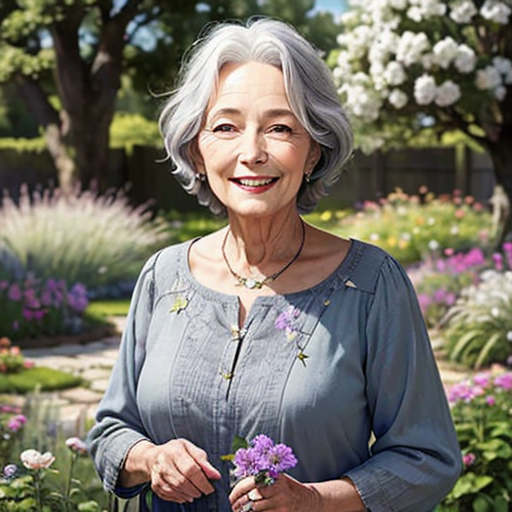
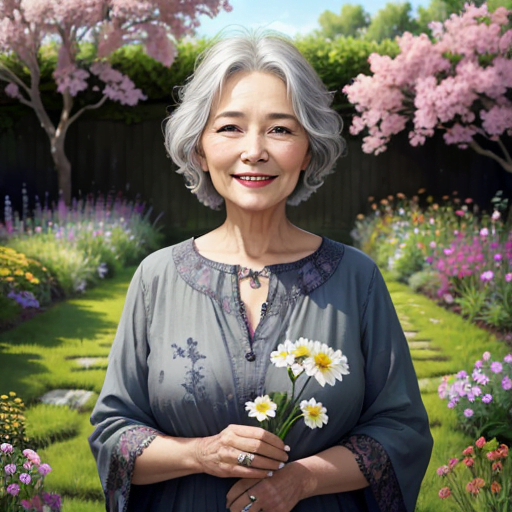
Embeddings are a fundamental part of crafting your images. You’ll end up finding embeddings you prefer over others, and you find that out by downloading a lot of seeing what ones make images you like more. For me, BadDream is excellent regardless of the checkpoint. You can combine them together and see what result you get!
txt2img
txt2image is where you go to generate images from text. There are a few things to know about the UI, the options and how they all work. Once you have the basics, you can start experimenting and learning the finer details.

The first box is your positive prompt, you write in here what you want your image to be. Some checkpoints weight the beginning of the prompt more than the end. Generally, I put the most important stuff first as a rule. People usually put a lot of ‘quality’ prompts in here such as best quality, masterpiece and so on.
The second box is your negative prompt, you write in here what you don’t want in your image. People use this to mostly add in ‘bad quality’ prompts such as deformed, extra limbs, worst quality, watermark, and so on.
In both boxes, you separate the things you’re writing with commas, for example:
Positive: a man, late 50’s, fancy suit, top hat, cane, elegant
Negative: bad quality, extra limbs, deformed, worst quality, ugly
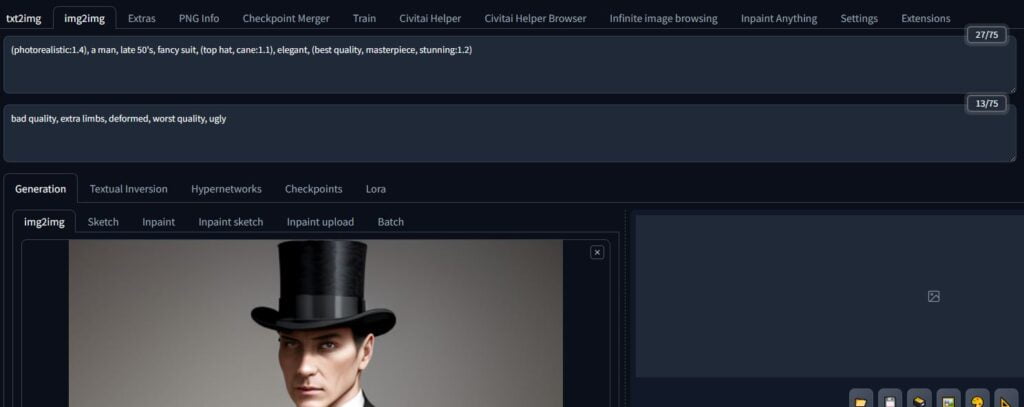
Additionally, you can weight items in your prompts yourself. Either write them as: (best quality:1.4) or click on the word and press CTRL + UP on the keyboard to increment up and DOWN to increment down. Higher numbers are weighted more. You can enclose multiple prompt elements in the brackets, and have more than one set of brackets. You can also use this to enforce your ‘style’. Updating the prompt above, we could use:
Positive: (photorealistic:1.4), a man, late 50’s, fancy suit, (top hat, cane:1.1), elegant, (best quality, masterpiece, stunning:1.2)
Negative: I’d normally just use the negative embeddings shown above. For now, I’ll use what I wrote.
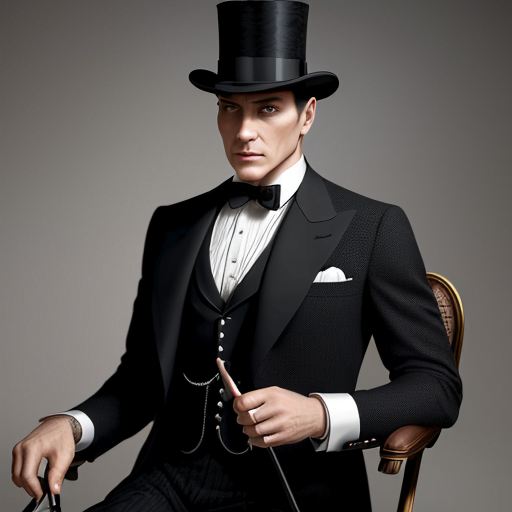
That’s how this comes out using Dreamshaper. It took a few tries to get something that was decent. Not all images had a cane, and some didn’t look nice. It takes a few tries.

Next come the samplers. The sampling method is intimidating because there are a lot of them. Know that while it’s useful knowing a few of them, I only use one. I might use two on occasion, but generally, I always use DPM++ 2M as the sampler and Karras as the Schedule Type.
The abridged version is that different samplers take different amounts of time, generate the image in different ways and look better than others, and require different amounts of sampling steps.
Talking of steps, Sampling steps are the number of iterations Stable Diffusion will run through to generate the image. More steps doesn’t equal better quality. Sampling methods generally have a limit where they don’t get better and just end up wasting your compute and real life time. If you used DPM++ 2M Karras at 25 steps, it’ll look the same as 100 steps.
I’ve seen people use Euler as a way to quickly gauge how good a prompt is because it’s fast. Euler a is used for anime images sometimes, but I’ve had good results in all image generation styles using DPM++ 2M Karras. Skip the hires fix, that’s upscaling and you don’t need it this early on.

Keep the size the default value. You can increase it if you like, keeping it square, but you don’t really need to by much and it’ll tax your computer.
Batch count is the number of images it will generate in succession. When you generate multiple images with batch count, it actually increments the seed by a value of 1 each time, giving you that variety in the images generated. It’s a way to check what might look nice, if Stable had a moment to give it a few tries.
Batch size is something I don’t use. If you hover over it, it’ll tell you what it does.
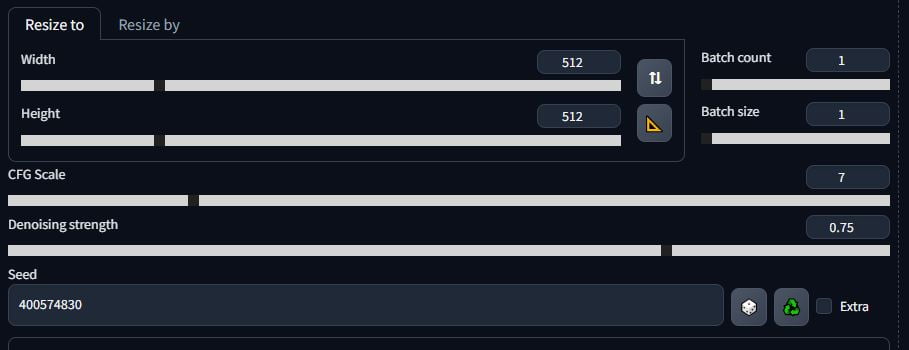
Finally, the CFG scale is a measure of how ‘creative’ Stable is allowed to be with your image. The higher the number, the closer the image is to your prompt, but raising it too high can make the image look bad. I usually leave it at 7, because I like how that comes out.
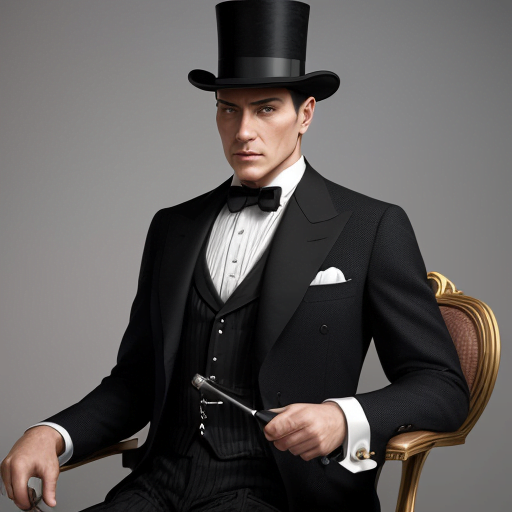
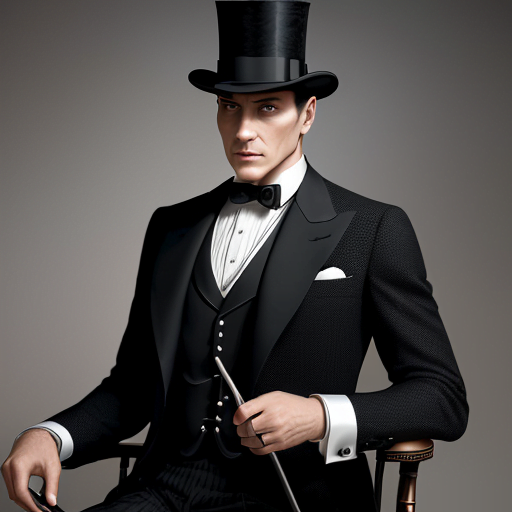
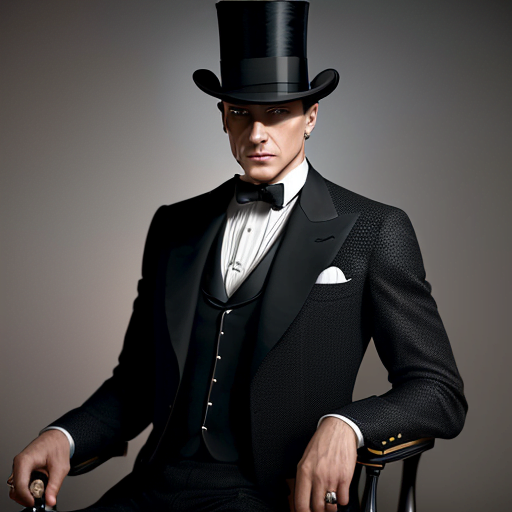
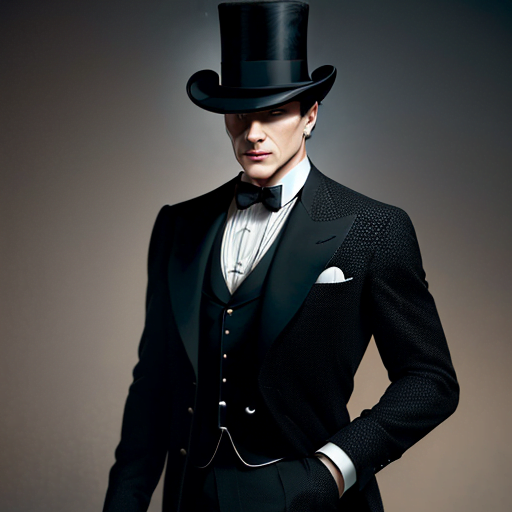
Above is the same image of our swanky man, but using the CFG scale 4, 8, 12 and 16. Is a high or a low CFG scale better? It depends on what you like. It’s subjective – experiment. Additionally, remember that clip skip setting we added to the UI at the start? Change that from 1 to 2 and see how it changes the image. I generally always keep it on 2.

Finally, seed acts like it would in many other things that use a seed – it’s the starting condition that influences the output. If you generate an image and use the same seed for the next one and change no settings, it’ll look the same. -1 Seed means random. Clicking the recycle button will grab the last seed used so you can stick with a seed you like.
img2img
Using the PNG info tab, you can load in images and then send them to txt2img, inpaint, extras, or what we’re doing now – img2img.

Once loaded in, you’ll notice that it has populated with the values you used to make the image. The prompt and negative prompt have carried over.
Scroll down and you’ll see the same sampling method section. DPM++ 2M Karras all the way, baby!

Here, you can leave it the same except for one thing – the denoising strength. You might want to mess with the CFG scale as well but the denoising strength is key. A low number will influence the image less. A high denoising strength will alter the image more, but might become a little unstable visually or change it too much.
All I’m going to do is change the positive prompt from:
(photorealistic:1.4), a man, late 50’s, fancy suit, (top hat, cane:1.1), elegant, (best quality, masterpiece, stunning:1.2)
to:
(photorealistic:1.4), a man, sports clothes, (baseball cap, moustache:1.1), elegant, (best quality, masterpiece, stunning:1.2)
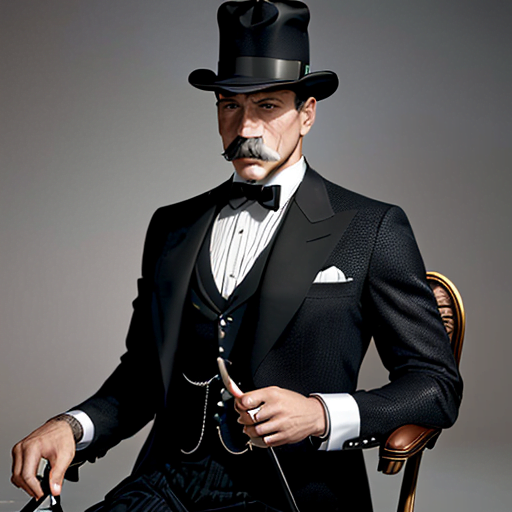
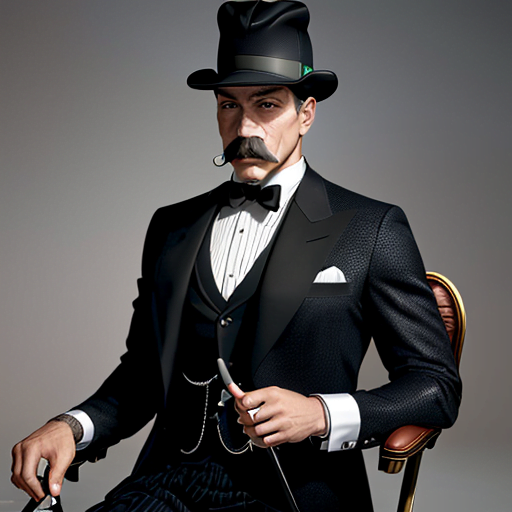
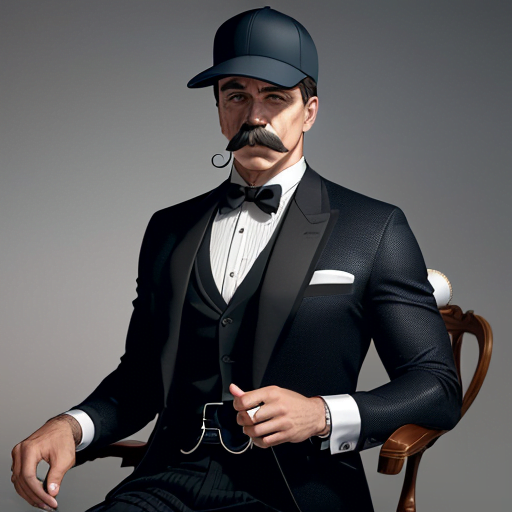
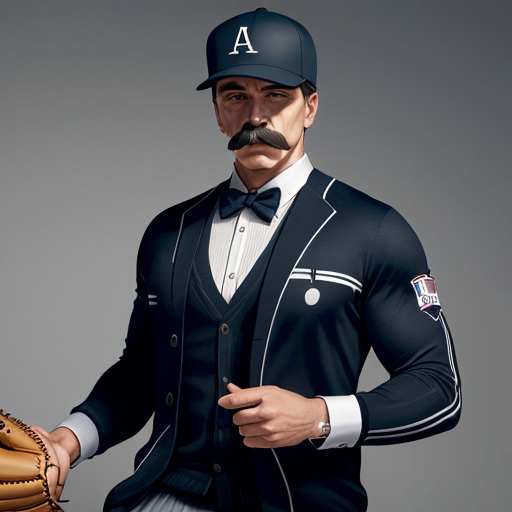
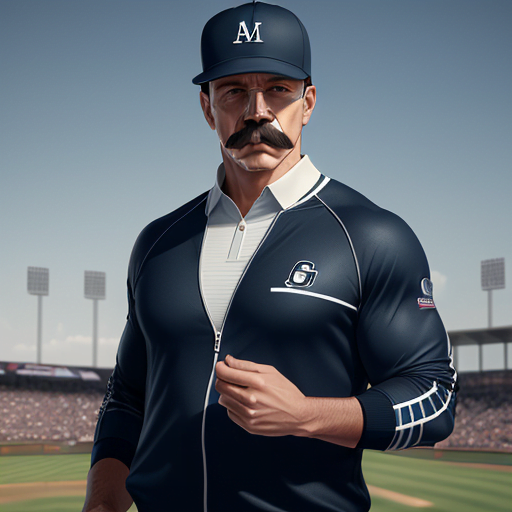
The above images use the change in prompt using a denoising value of 0.4, 0.5, 0.6, 0.7 and 0.8. You can actually see him making some excellent bicep gains as we raise the denoising value. img2img2 work is great for making changes to your image, but if you want a more delicate or specific alteration, then we’d best use inpainting.

You can load an image in Inpaint by clicking in the empty region, or use the PNG info tab to send to inpainting.

The resize options don’t really matter if your image size isn’t changing.

Masked content:
fill – isn’t very good, I never use this
original – uses the original image to influence the output
latent noise – adds noise over the image to alter the image with less influence from the original image
latent nothing – also not very good, I never use this
Inptaint area:
Whole picture – will keep re-render the whole image
Only masked – will treat your masked area effectively as your whole frame which will let you have more detail
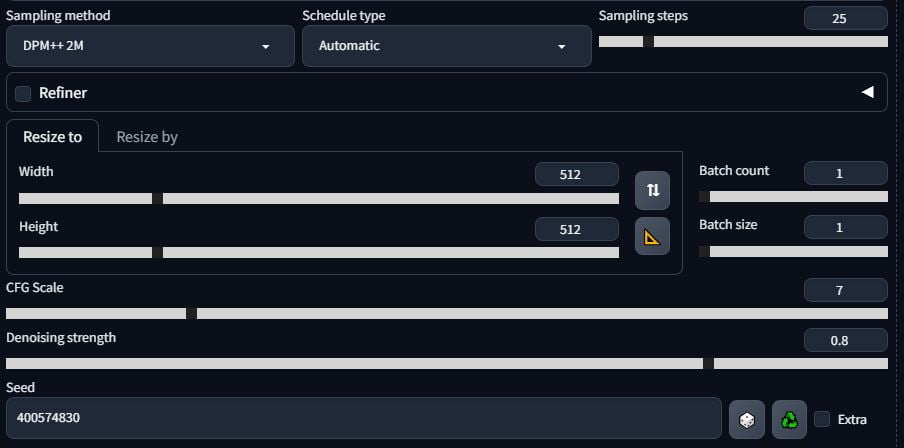
All of the other options you know from the previous sections.
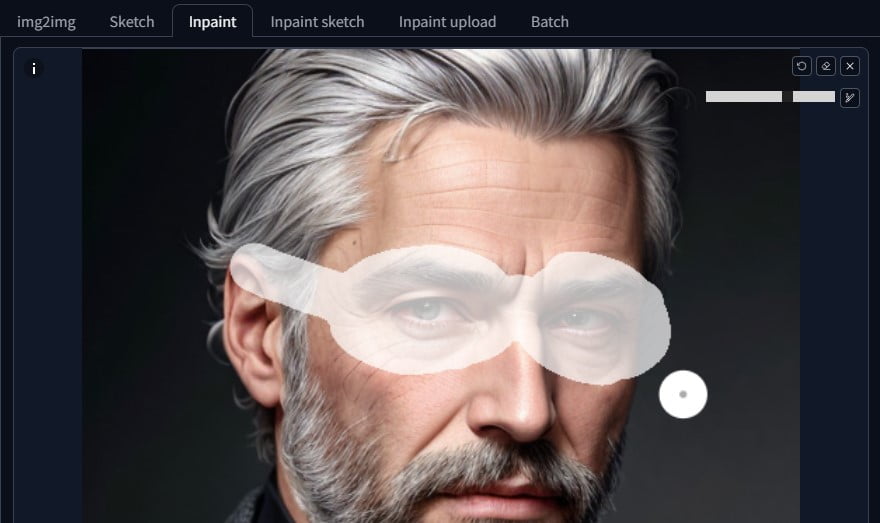
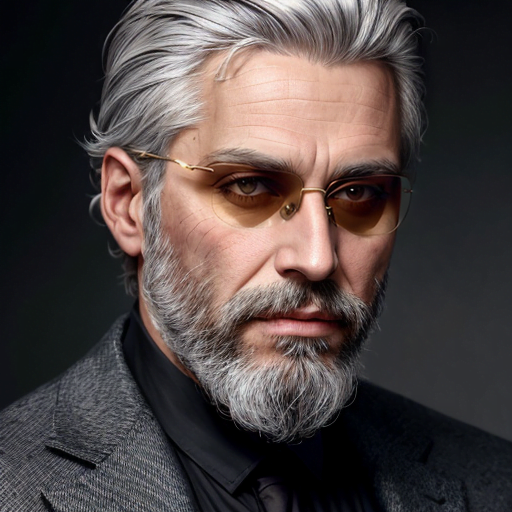
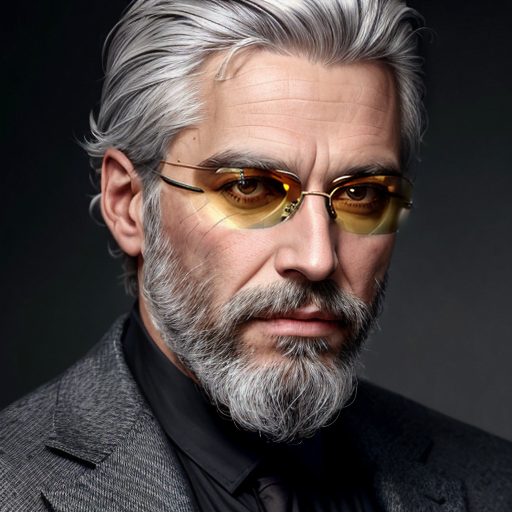
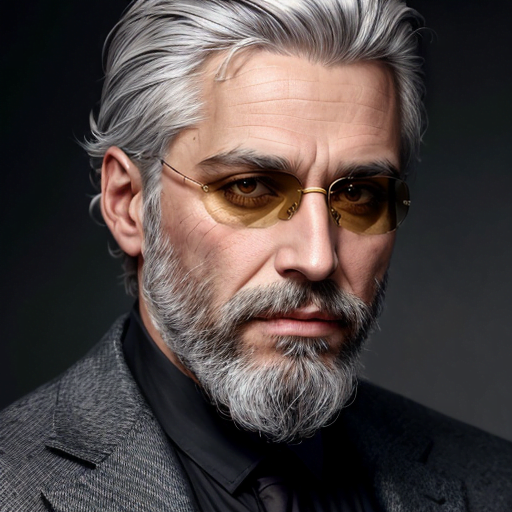
Let’s give the gentleman from earlier some awesome aviator glasses. Draw a mask around the rough area, I set my settings to:
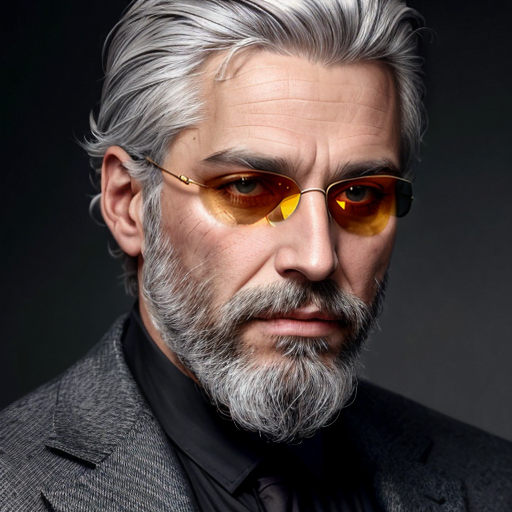
Denoise: 0.5, Mask content: latent upscale, Inpaint area: only masked. Now has has some shades. You can do this again – send your inpainted image back to inpainting and draw some more! My positive prompt was simply: aviator shades. Stable Diffusion did the rest.
Inpaint Anything
Now it’s time for the the extension we installed at the very beginning: inpaint anything. If you try to inpaint, you’ll notice that it works in a heavy-handed MS paint kind of way, but it doesn’t let you be specific with your mask. That’s where this extension comes in.

In the Inpaint Anything tab, first select a Segment Anything model. If you don’t have it, click on Download model.
You’ll have to play around with what gives you the result you want.
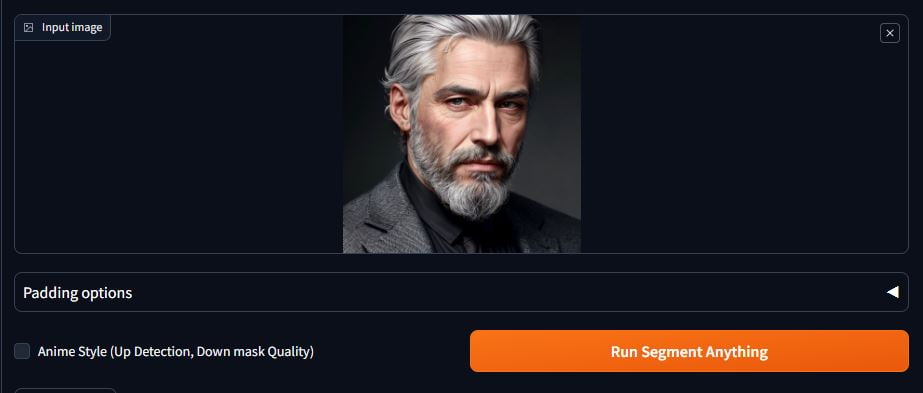
Load your image of choice in the Input image section and click on Run Segment Anything.
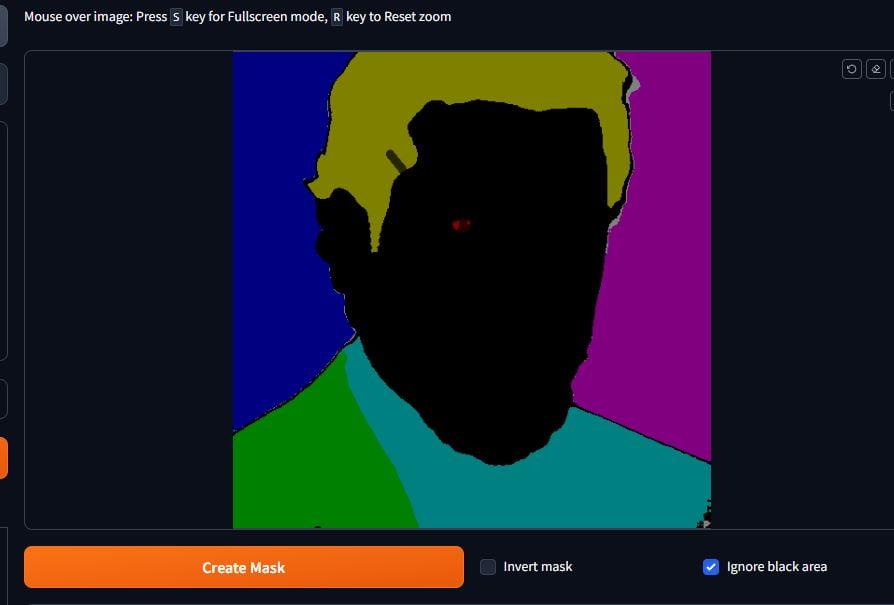
It will render out segments of the image as different colours. Draw lines over the sections you want or don’t want. Invert the mask if that’s how you want to do it, then click on Create Mask.
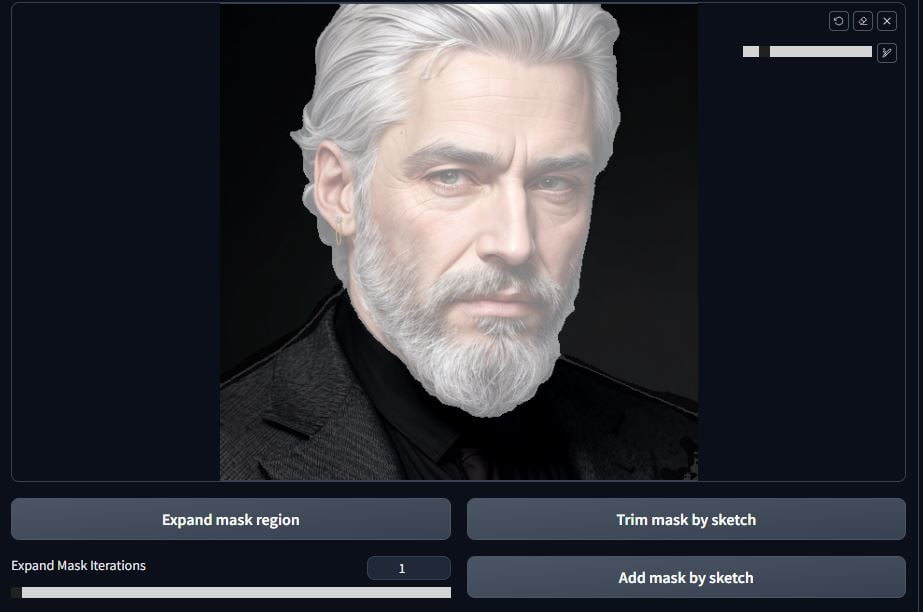
It’s usually pretty decent. The area masked will be translucent bright white. You’ll notice that I have some lines on the shoulders included in the mask and some spots in the bottom right. Draw over what you don’t want and click on Trim mask by sketch.
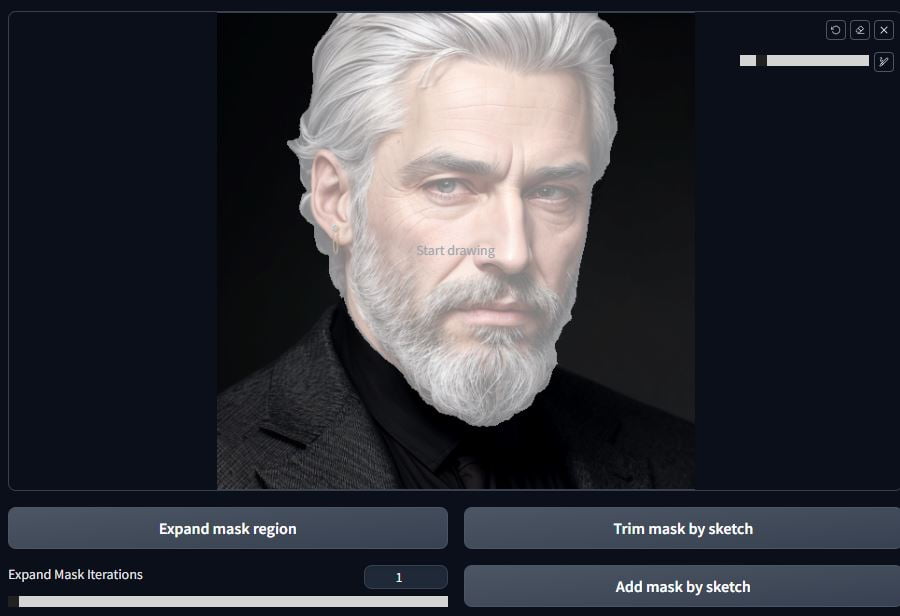
Much better! Now the mask is ready.
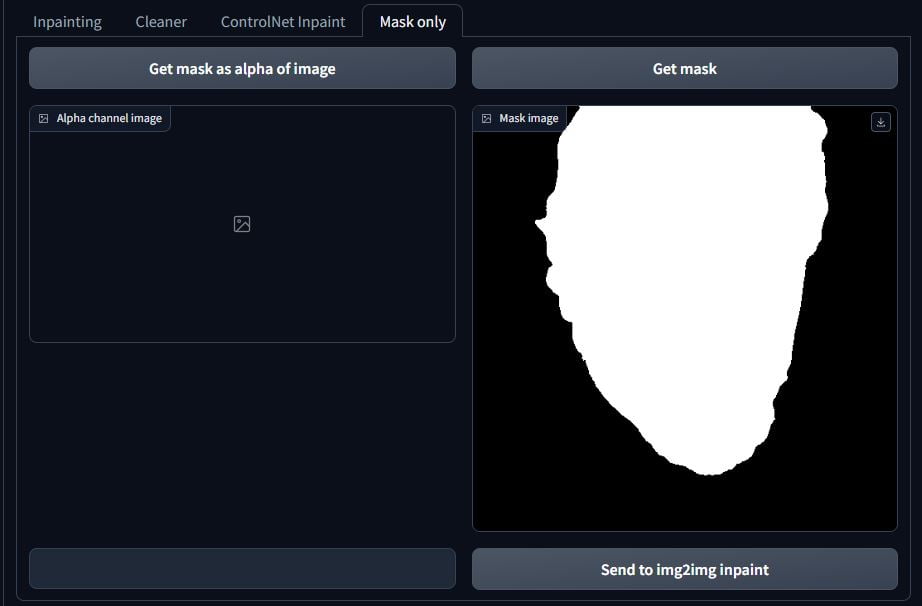
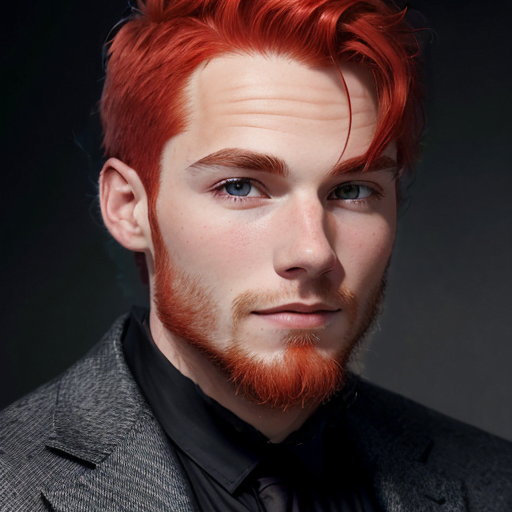
Head over to the tabs on the left and go to Mask only. Click on Send to img2img inpaint. The rest is what you already know from above. I used the prompt: young man in his 20’s, feisty, red hair, and the negative prompt was just: easynegative <- (a negative embedding).
Denoise was 0.6, Masked content: original, Inpaint area: Whole picture. Boom! There he is! Not perfect but not bad for a first attempt.
ControlNet
ControlNet as the name might suggest, allows you a lot of control over the specifics of your image. I will be showing your my two go-to ControlNet features and you can experiment with the rest of them if you wish. These features being OpenPose and Canny.
OpenPose analyses an image and generates a basic skeleton to enforce the position of the new image.
Canny analyses the image content and generates a map of the lines within it to control the look of the new image.
Downloads for these models are on Hugging Face:
OpenPose: https://huggingface.co/lllyasviel/control_v11p_sd15_openpose
Canny: https://huggingface.co/lllyasviel/control_v11p_sd15_canny
The author has more models for ControlNet among other things, but for now, we’ll just use these two.
Put them in the ControlNet folder:
stable-diffusion-webui-master\models\ControlNet

To activate Controlnet, click on the ControlNet box.
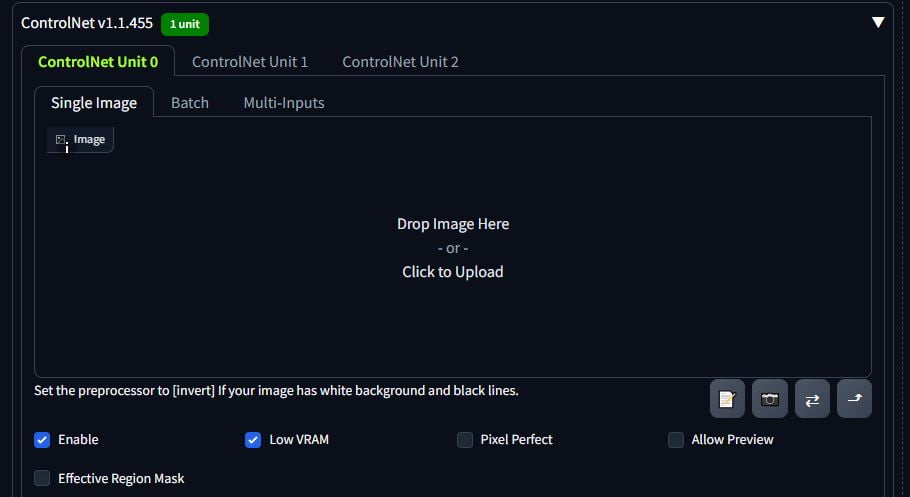
You will have three ‘units’. This means you can stack ControlNet tabs to work together. For now, use one. Click Enable so that the tab works. Whatever image you want to use as the input (the image that ControlNet will use) in the Image box. I always tick Low VRAM.

Select your preprocessor. This will be the type of model you downloaded from HuggingFace. Select the model. Don’t click on the boom button yet.

I’ve had a lot of success not messing with these sliders very much. The only ones I touch are Low Threshold and High Threshold. If you’re using Canny for example, it will change the threshold for light and dark for generating the outlines (this will make sense in a bit).

I usually select ControlNet is more important so that it takes priority. Resize doesn’t matter if your images are the same size.
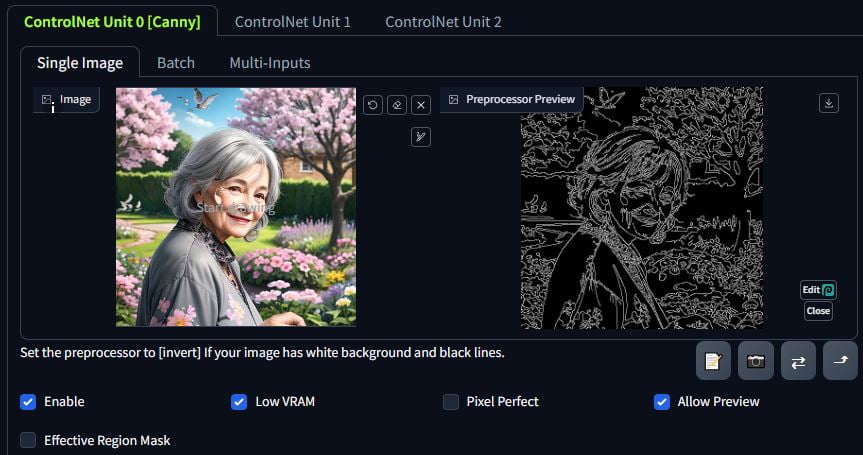
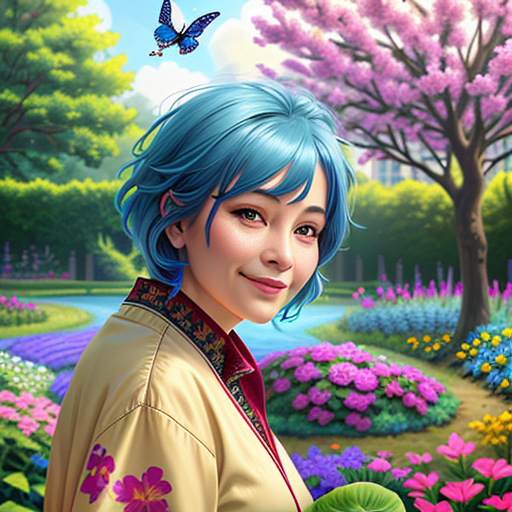
Here is an example using Canny. Click on the explosion button in between the preprocessor and model dropdown. If you get something you like, then great. If it doesn’t look defined, then you can mess with the threshold sliders. I used this in txt2img to generate the below image by asking for a picture of a young woman with blue hair in a flower garden. The result is the prompt + the lines from Canny and not the reference image itself.
Next we’ll use OpenPose. It’s the same process but without the threshold sliders to mess with. Load in a reference image, select open pose, select the model and click on the explosion button. It will take some time to generate the skeleton.
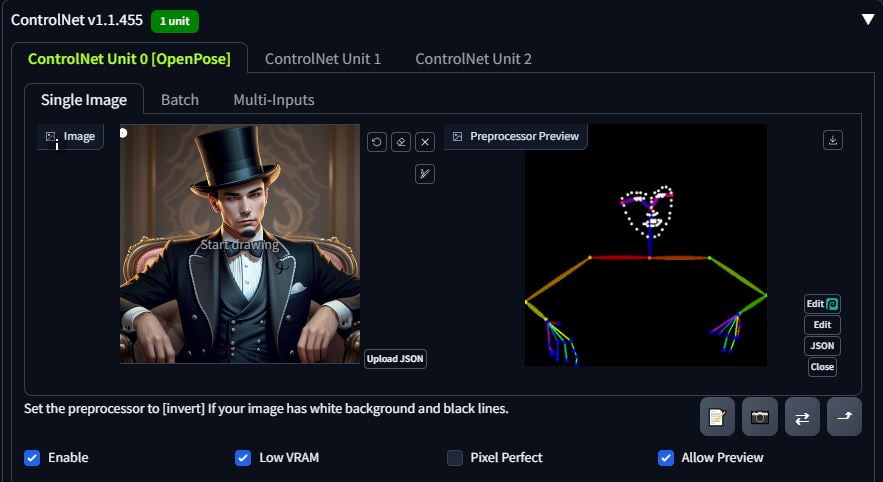
The below is the result of the same prompt as before but using the ControlNet skeleton with OpenPose. This is very powerful and you can download open pose presets from Civitai as well. The cooler application of this is: let’s say that you want to turn yourself into a cartoon. You can use a picture of yourself, stack Canny with open pose, use a cartoon checkpoint use txt2img or img2img and away you go.
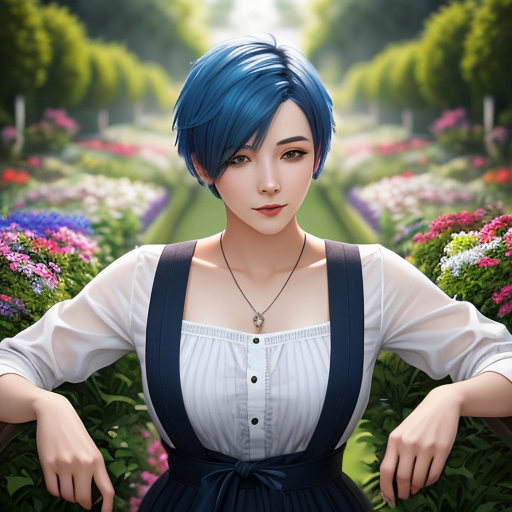
That concludes ControlNet. A note: ControlNet is taxing and makes generations take longer and you run the risk of crashing Stable Diffusion if you GPU can’t handle it. This is also the case for using Inpaint Anything – I’ve had both crash my program numerous times.
Upscaling
Upscaling is a required process if you want your images to look super high quality and detailed. When you generate images in 512×512 resolution, they look nice, but they are lacking when you really look at the details, especially if you view them enlarged. There are a few ways to do this and I’ll share the methods I like the best.

I’m going to upscale the cat I made earlier on in this page. Method 1 is using the extras tab. Load the image into PNG info and send to extras. You can of course, simply open the extras tab and load the image that way, I just like doing it like this.

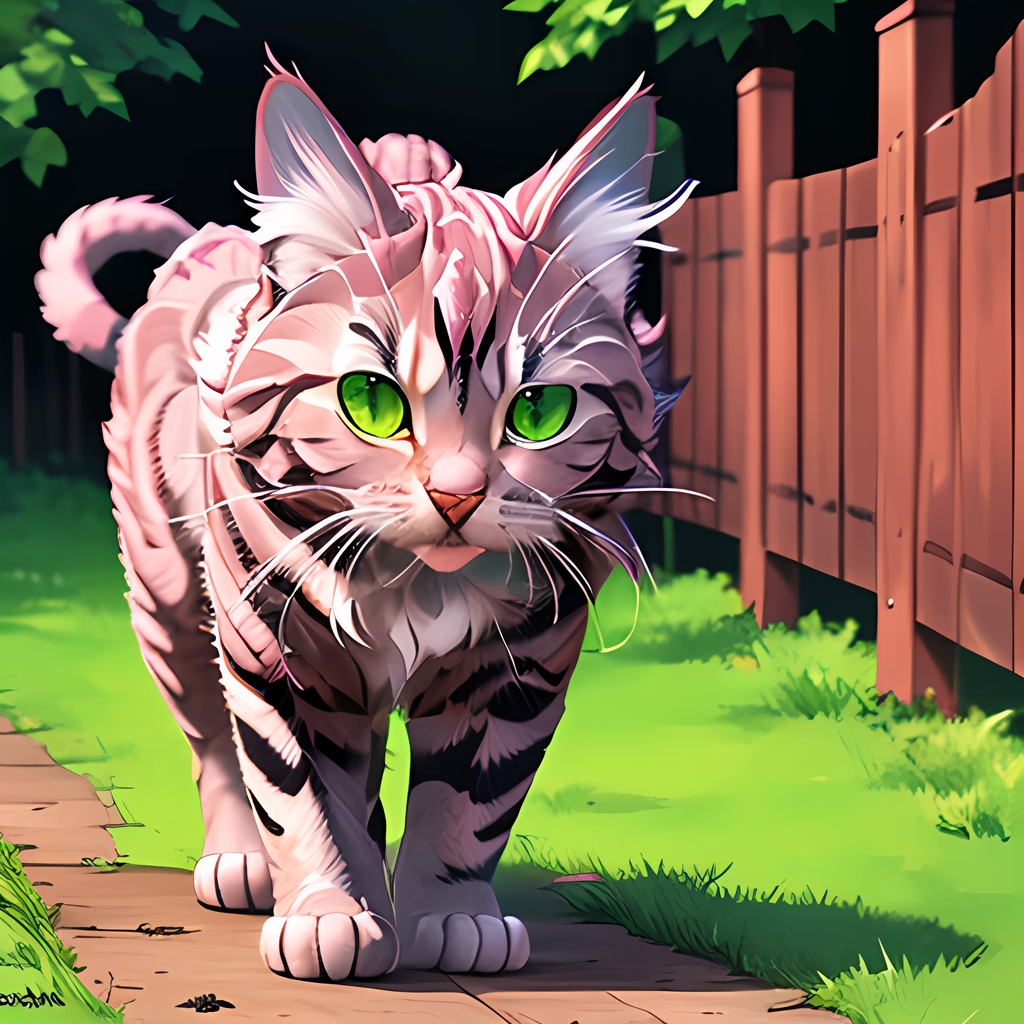
There are two upscalers I use: R-ESRGAN 4x+ and R-ESRGAN 4x+ Anime6B. I’ll give you an educated guess as to what that second one is for. I default to using R-ESRGAN 4x+. The scale by resize number is the size multiplier. Resize: 2 will turn a 512×512 image to a 1024×1024 image.
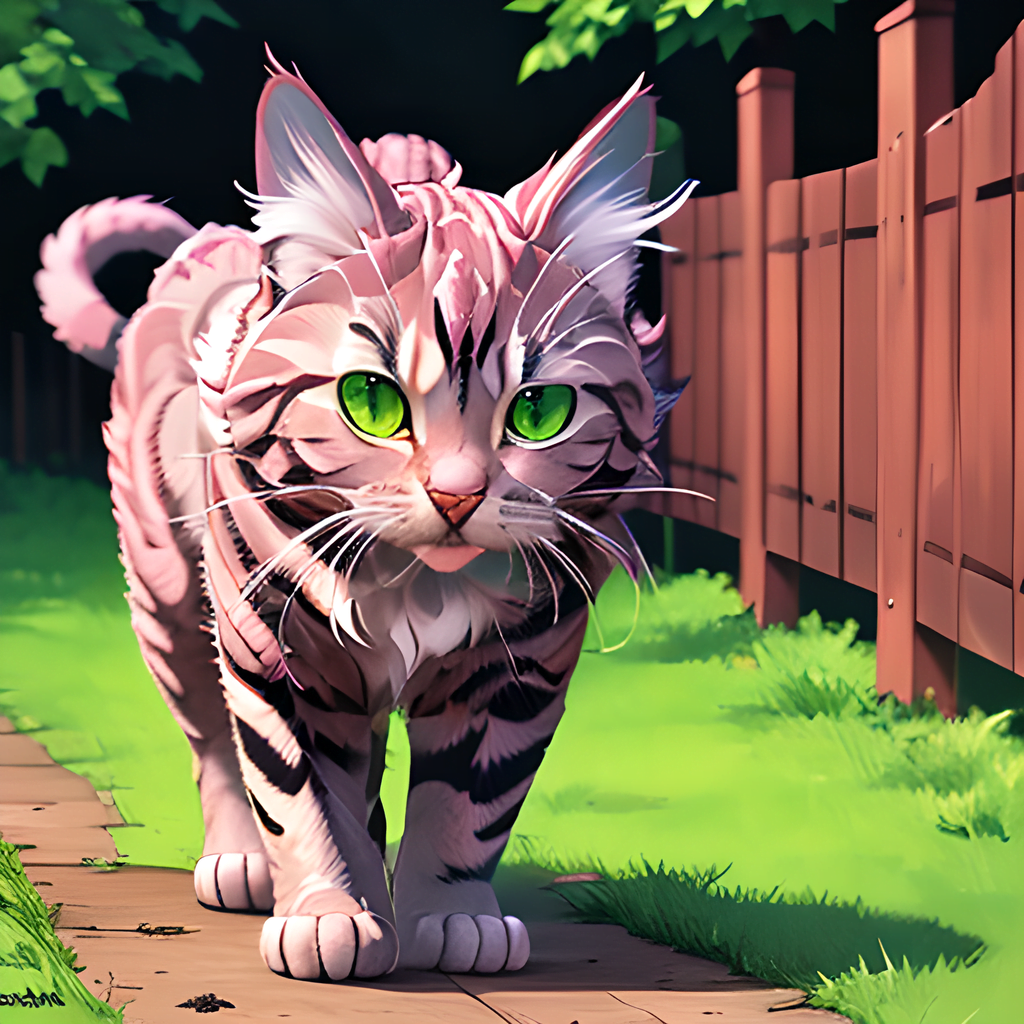
Left = R-ESRGAN 4x+
Right = R-ESRGAN 4x+ Anime6B
The benefit of this method is that it takes a few seconds, it’s extremely fast. The down side of this method, is that is has a strange over-sharpened look in places, and a “I didn’t add detail here” fuzzyness. It’s OK, but for a decent upscale, it doesn’t look very good to me.
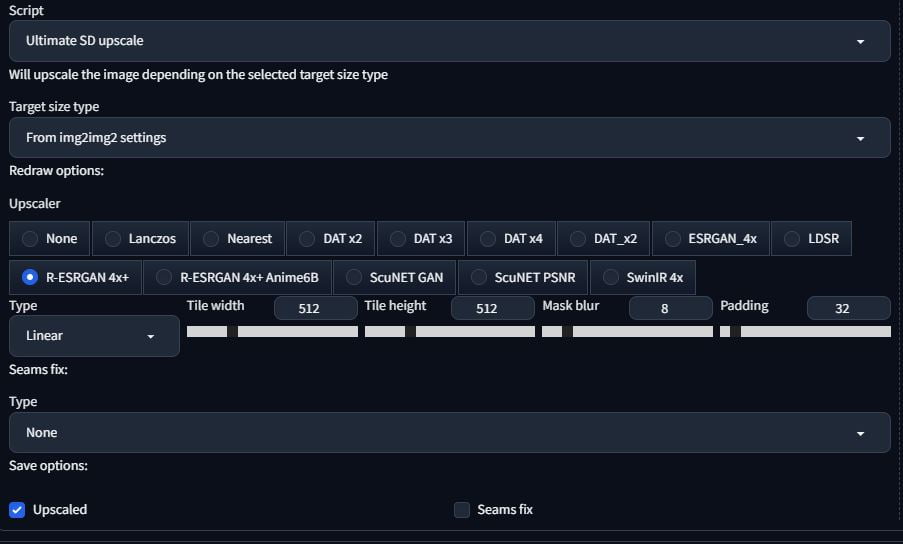
The second method is using the Ultimate SD Upscale extension. You can install it the same as you did earlier. Using the Ultimate SD Upscaler takes a much longer time to finish than the previous method. It takes longer than generating the original image. After using PNG info and loading the image into img2img, under the Script section, select Ultimate SD Upscale. Change to Resize by and select the multiplier. I use 2, because that’s enough. If you want more you can set it to more, it’ll take a long time, though.

CFG scale between 7 and 10 seems to work nicely. You want to set the denoising strength somewhere around 0.3 or 0.4. You want to introduce enough noise to allow Stable Diffusion to add detail, but not too much that it starts making a Frankenstein picture. Set your upscaler; I use R-ESRGAN 4x+ again. This extension will split you images into smaller tiles, render those and stitch it together. Tile width and height will set how large these tiles are. I make it 512×512 to match what normal image generation is.
After fiddling with the settings, you can come out with something pretty nice. Left = original, right = CFG 10 denoise 0.3 resized 2x (4x the resolution).

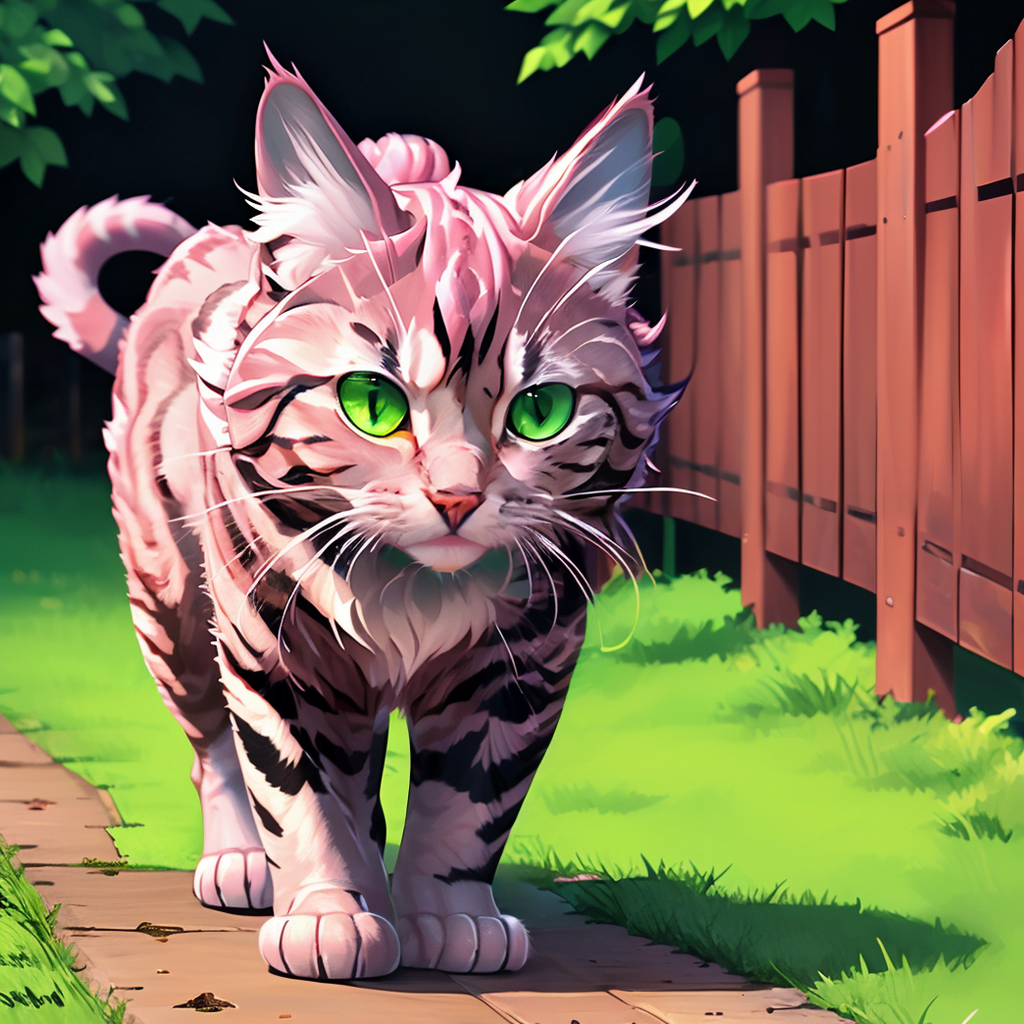
This method while longer, produces superior results. You can also use high res fix when using img2img or txt2img, but I’ve seen users say that’s not a good way to do it. It does take a while, and it works for me, but I’m not using that anymore. I’m still learning how this all works!
Scripts
There are some inbuilt scripts into Stable Diffusion that make learning how it works and trying different variables out much easier. You will find the Scripts section at the bottom of txt2img. Selecting a script will update the GUI to show that script’s settings. The XYZ script is amazing – it will iterate through a number of variable changes and put them into a grid for you to view at the end. You can have up to three variable types to test. Separate the values with comas. In the below example, it will render the same image using CFG scales of 4, 7, 10, 13 and 16. If I had chosen a second variable, such as checkpoint, then if I chose two checkpoints to test, it will do a render for each checkpoint for each CFG scale value.
Keep -1 for seed is for if you don’t care about replicating the seed per test.
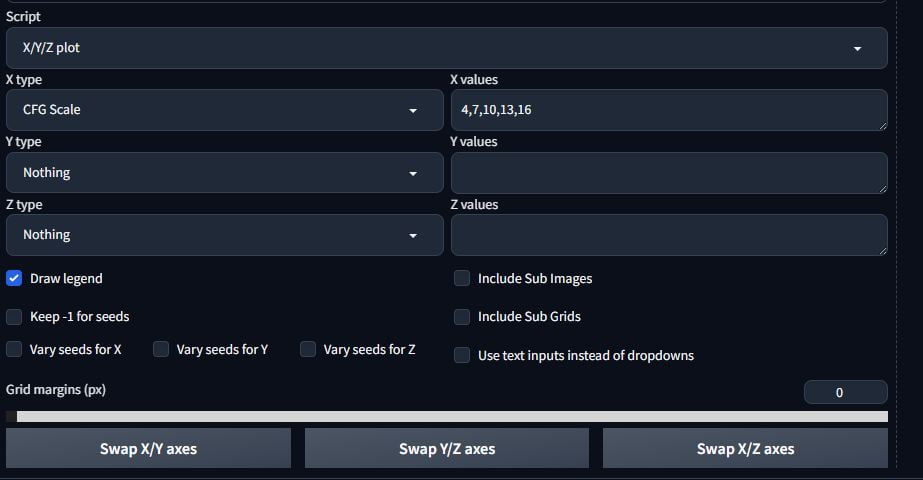
This is extremely helpful to test checkpoints and lora and general settings.

Another script is the prompt matrix. This lets you use the same settings for image generation while varying the prompt each time slightly.

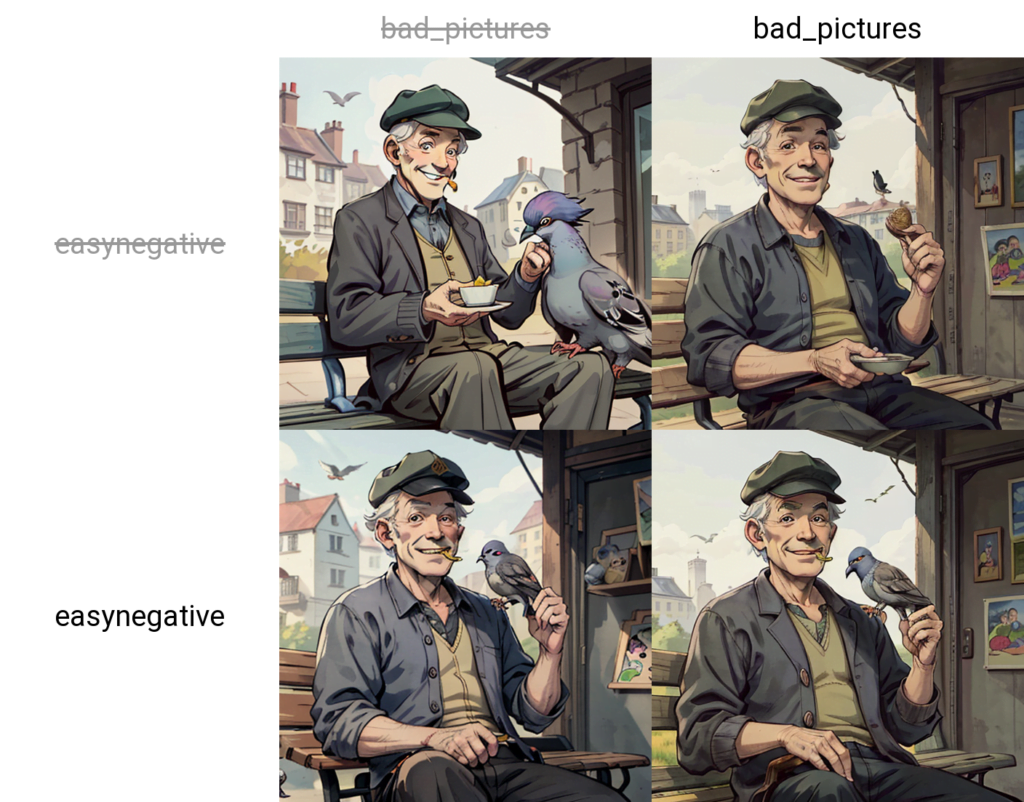
A prompt matrix is kind of useful, it will allow you to test a number of prompt elements against each other. You can do this for the positive or negative prompt. All you have to do is type the main prompt then add a pipe | followed by the first variable prompt, another pipe and so on. It will use the main prompt for all images, then test all variable prompts on their own and against all of the other variable prompts.
You can use this for example, to test the negative embeddings you’ve downloaded.
For example: bad quality, | bad_pictures | easynegative
My positive prompt remains the same:
an old man sitting on a bench, flat cap, smiling, hunched over, gray hair, feeding pigeons, sunny morning,(masterpiece, best quality, photogenic, cartoon:1.3)
The result is the below matrix of the image just using “bad quality”, then using bad_pictures, then using easynegative, then using bad_pictures and easynegative. The more you add, the longer it will take.
And lastly, there is prompts from file or textbox. You can simply add multiple prompts to the box (or load a file with multiple prompts) and it’ll iterate through them all.
The below example uses 4 prompts in the script:
an old man sitting on a bench, flat cap, smiling, hunched over, gray hair, feeding pigeons, sunny morning,(masterpiece, best quality, photogenic, cartoon:1.3)
an old man sitting on a bench, police uniform, smiling, hunched over, gray hair, talking on the phone, sunny morning,(masterpiece, best quality, photogenic, cartoon:1.3)
an old man sitting on a bench, flat cap, smiling, hunched over, gray hair, stroking a cat, sunny morning,(masterpiece, best quality, photogenic, cartoon:1.3)
an old man sitting on a bench, postman outfit, newspaper bag, smiling, hunched over, gray hair, feeding pigeons, sunny morning,(masterpiece, best quality, photogenic, cartoon:1.3)
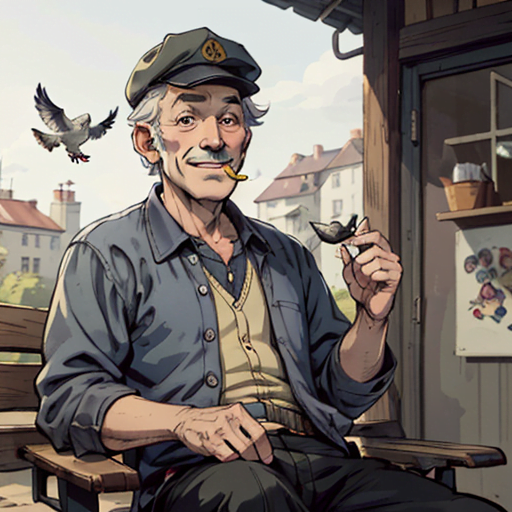
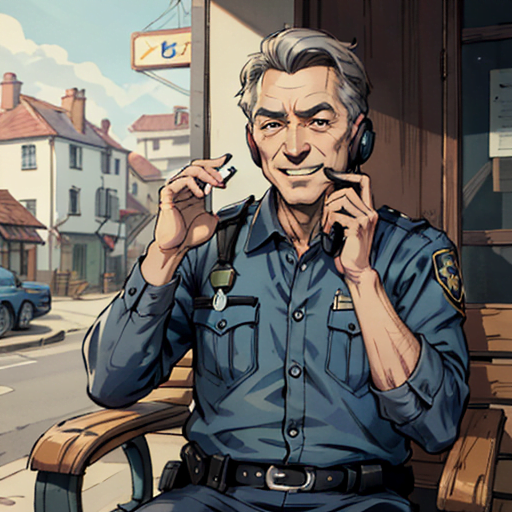
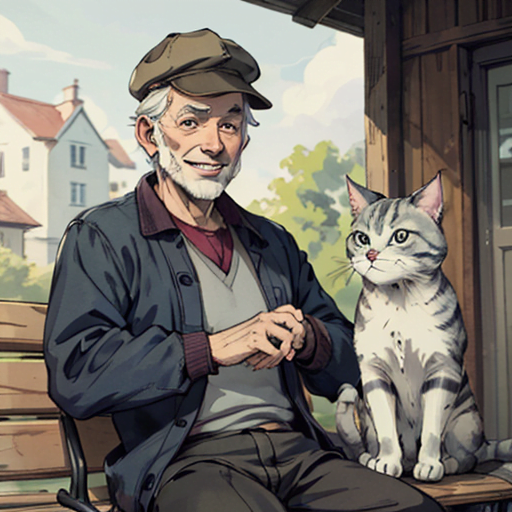
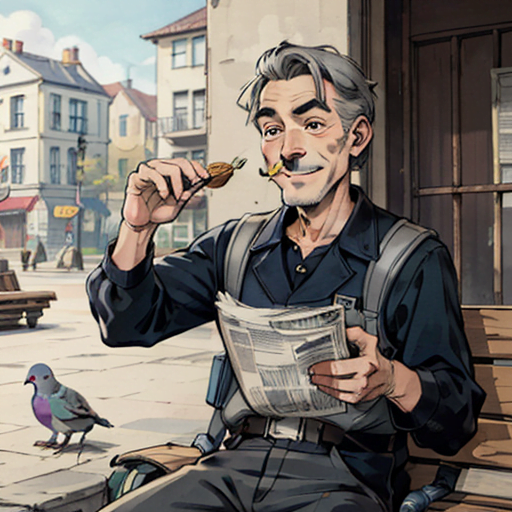
And that’s all there is to it. You can do a lot of testing and experimentation with the scripts it gives you access to.
Summary
That ended up being more of a lengthy guide on how to use Stable Diffusion than a project to complete. I’ve spent many months testing and figuring out how this works and learning how to use the scripts, control net, img2img, inpainting, txt2img and learning about checkpoints, lora and embeddings. I still have a long way to go, but I hope that you have the means to go and start creating your own AI art now. and if you already do, that you learned something along the way.


